Plumbing

Pressure Control Water Regulator

A water regulator valve is built to maintain water pressure at a reliable level for your home and garden. It safeguards your plumbing, lengthens appliance life, and cuts down on wasted water. Residential settings commonly fall between 40–60 psi, with many factory presets near 45–55 psi. Properties supplied by town water or well systems delivering 40–90 psi often benefit from a Main Water Pressure Regulator to comply with local codes and prevent damage.


Install a Pressure Regulator For House where the main line comes into the building, typically after the main shutoff and often with a check valve and filter. Most House Water Pressure Regulator units come with an integrated strainer and gauge for simple testing. Adjustment is manageable: shut off supply, relieve pressure, loosen the locknut, turn the adjustment knob to set the desired psi, restore supply, and verify with a gauge.

A Water Pressure Regulator is highly useful for irrigation and drip systems because it controls inlet pressure to match emitter requirements and limits blowouts. For bigger layouts, confirm minimum flow specs and consider a pressure limit valve for constant outlet pressure. If the regulator cannot to adjust or maintain steady pressure, it is time for repair.

Core Takeaways

  • A Pressure Water Regulator helps protect pipes, fixtures, and appliances by keeping pressure in the 40–60 psi range.
  • The Main Water Pressure Regulator should usually be installed after the main shutoff, filter, and check valve.
  • Many regulators arrive pre-set around 45–55 psi and include a gauge plus strainer for convenient inspection.
  • Garden systems work best when regulator GPM capacity fits demand, especially when a pressure limit valve is used for multi-zone layouts.
  • Routine checks include relieving pressure, adjusting the knob, testing with a gauge, tightening the locknut, and inspecting for leaks.
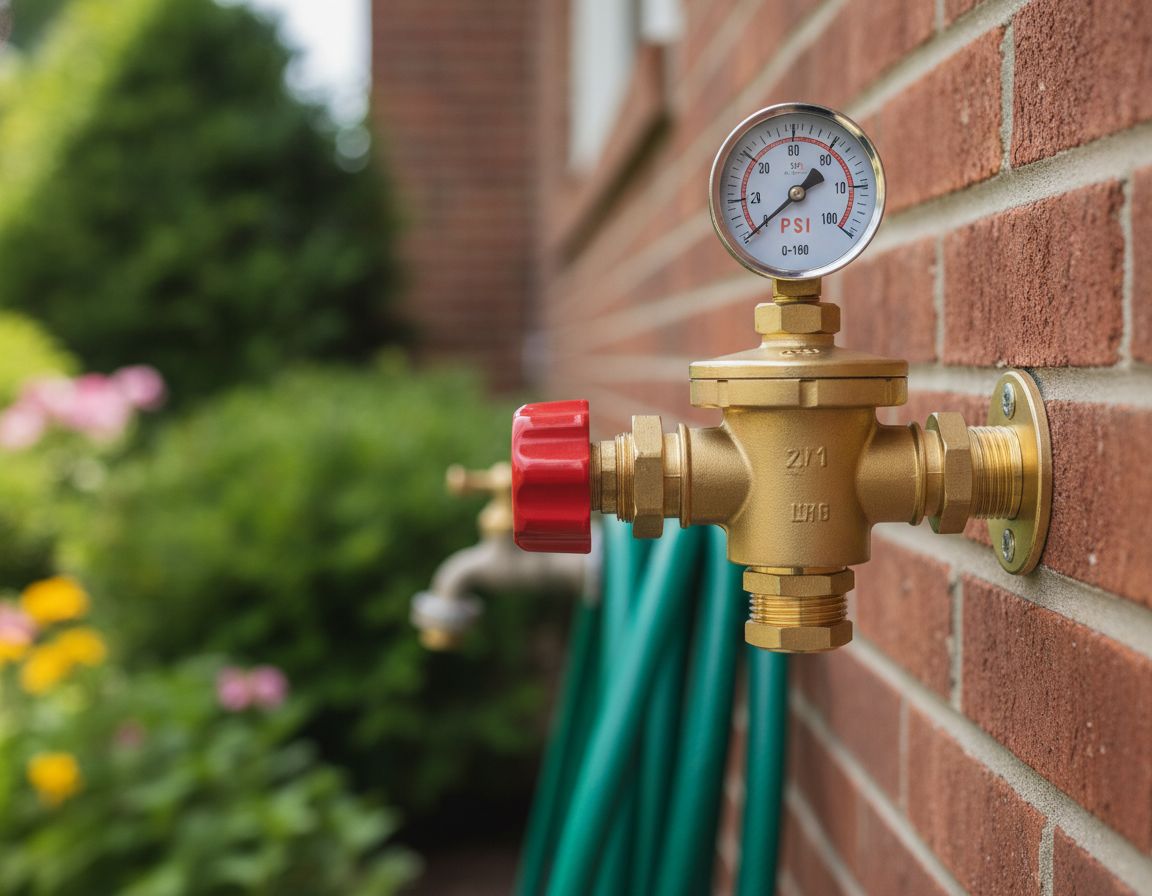
Water Regulator Valve

Understanding Water Pressure Regulators: What They Are And Why Your Home May Need One

A Pressure Water Regulator is a practical device that keeps incoming water pressure at a safe level for a home. You may also see it called a PRV, a pressure regulator valve, or a Water Regulator Valve. Manufacturers such as Watts and Honeywell, along with many plumbers, often use these terms in specifications, manuals, and installation instructions.

Inside a typical Pressure Regulator Valve, you will find a diaphragm, spring, seat, and t-stem. Incoming water pressure moves the diaphragm, and the spring counteracts the pressure. The t-stem adjusts the seat opening as demand or supply pressure changes.

Most homes aim for 40–60 psi at fixtures. Codes such as the International Plumbing Code set upper limits near 80 psi to protect piping and appliances. A Water Pressure Reducing Valve is often required when municipal supply pressure exceeds local code limits or when frequent meter-side spikes appear.

Using a Water Pressure Regulator limits stress on copper, PVC, and fixtures. Lower, stable pressure limits water waste from leaks and slows wear on water heaters, dishwashers, and washing machines. Drip systems and irrigation zones last longer when outlet pressure is matched to the needs of emitters, tubing, rotors, or sprays.

Water regulators are available in pre-set and adjustable designs. Each model lists minimum and maximum flow rates plus a minimum operating flow. In garden systems, outlet pressure should suit the components, because drip emitters and micro-sprays usually need far lower pressure than rotors, sprinklers, or foggers. When performance drops, clean or adjust the regulator; if it still cannot hold pressure, repair it.

Where To Install And How To Choose A House Pressure Regulator And Irrigation Systems

Selecting the best regulator requires attention to placement and system flow demand. A Main Water Pressure Regulator is normally installed at the point where the service line enters the home. This may be in a basement, garage, utility room, crawlspace, or outside service header. A common layout uses a main shutoff, then a check valve and filter, followed by the pressure-regulating device. Installing it after the filter helps keep debris away and may extend the device’s life.

Pressure Regulators may be installed near the main shutoff, close to the water meter, or ahead of irrigation timers and controllers. In irrigation layouts, the regulator is usually best placed after filtration and before control valves, timers, or zone devices. That placement supports consistent pressure at drip emitters and micro-irrigation parts. In small service closets and basements, choose accessible locations for future checks and gauge attachment.

Sizing should be based on water use, not only on pipe size. Calculate irrigation demand by adding emitter flow in GPH and converting it to GPM. Whole-house installations require enough GPM to handle showers that may operate together. When system flow is below the regulator’s minimum requirement, regulation may become ineffective, causing pressure to rise or fluctuate.

When selecting a unit, compare flow ranges carefully. Compact models may operate from 0.5–7 GPM, mid-size units may handle 5–18 GPM, and heavy-duty models can reach 70 GPM for larger homes. Choose a Pressure Regulator For House that matches peak demand and meets local inlet pressure limits.

Your zone design should determine whether a standard pressure regulator valve or a Pressure Limit Valve is the better option. A pressure limit valve is useful where flow may stop, since it maintains outlet pressure near the chosen set point. Standard regulators are often better downstream near each zone or fixture where minimum flow is very low.

Thread types and connection sizes are critical for a clean installation. Typical connection options include 3/4″ hose-thread, 3/4″ pipe, 1″, 1-1/4″, 1-1/2″, and 2″ pipe-thread sizes. Many models feature a gauge port or hose-thread boss for easy verification. Look for integrated strainers, built-in filters, and brass bodies to reduce clogging and corrosion.

When comparing options, consider certification and code compliance. A Main Water Pressure Regulator rated for local inlet pressures protects plumbing and appliances. Units with a visible gauge and removable strainer make routine maintenance, pressure checks, and quick troubleshooting easier.

Installation, Adjustment, And Maintenance Tips For Reliable Performance

Efficient, long-lasting systems require careful planning and regular upkeep. A good installation starts with a practical plan and quality parts from trusted suppliers. The following guidance covers key steps for installation, fine-tuning, and ongoing maintenance. These practices help maintain consistent Water Regulator Pressure and long-term reliability.

Before-Installation Checklist And Recommended Placement

Place the regulator downstream of the main shut-off and after coarse filtration. For standard Water Regulator Valves, install it before downstream valves or timers. Confirm that the regulator meets your system’s minimum flow requirement. Also check whether it includes a built-in gauge or strainer. If not, plan for a separate gauge or port from Installation Parts Supply.

Step-By-Step Installation Overview

Start by shutting off the main supply, then open a faucet to release pressure. Install the regulator in the correct direction by following the manufacturer’s flow-arrow marking. Choose the right thread adapters, couplings, or fittings for the connections. Apply thread sealant or tape as instructed and tighten fittings to the recommended torque.

Restore supply gradually and watch each connection for leaks. Test multiple fixtures to confirm consistent Water Regulator Pressure. When the regulator lacks a built-in gauge, connect a hose-bib gauge to a test point so the pressure can be verified.

How To Set A Water Pressure Regulator Safely

Always relieve pressure before adjusting the regulator. Loosen the locknut on the adjustment stem and turn the knob in small increments. In most designs, clockwise rotation increases pressure, while counterclockwise rotation decreases it. Monitor a reliable gauge during adjustments and test several outlets for consistent pressure.

After the target pressure is achieved, tighten the locknut and recheck the fittings for leaks. If pressure swings or the unit fails to hold a setpoint, stop adjusting. Consult a licensed plumber or consider replacement parts from Installation Parts Supply.

Ongoing Maintenance And Expected Service Life

Check the regulator on a regular basis for seepage, corrosion, vibration, and loose fittings. Use a hose-bib gauge to test pressure, and if fluctuations appear, compare readings across several days. Follow the manufacturer’s instructions to clean integrated strainers or screens.

Most models have a service life of about 10–15 years. A unit with ongoing corrosion, unstable pressure, or mechanical failure should usually be replaced. Keep spare gauges, seals, and fittings from Installation Parts Supply available for easier repairs and less downtime.

Frequent Issues, Diagnosis, And When To Replace Or Call A Plumber

A failing Pressure Water Regulator can show up as sudden pressure swings, loud pipe banging, or a steady rise or drop in psi. Homeowners may also see corrosion, leaks around fittings, or an inability to maintain a stable setting on a Water Pressure Regulator. Such symptoms commonly suggest damaged internal parts or screens clogged with grit and sediment.

Simple checks can often resolve issues before professional help is needed. Connect a pressure gauge to an outdoor hose bib or water-heater outlet to confirm the actual downstream pressure. Make sure the main shutoff and zone valves are fully open. For irrigation, verify that each zone meets the minimum flow needed for the Pressure Regulator Valve to regulate correctly.

If your regulator has an integrated strainer, shut off supply pressure and clean or replace the screen to remove grit and sediment. After reassembly, test the unit again and compare gauge readings. Low flow through a House Water Pressure Regulator can cause pressure to climb when fixtures close. Consider whether a Water Pressure Reducing Valve or limit valve is better for multi-zone irrigation.

When adjustments do not change readings, or the unit will not hold the set pressure, replacement is usually required. Persistent humming, hammering, or sudden pressure spikes may indicate a failed diaphragm or spring. Age also matters; regulators older than 10–15 years often need replacement even when leaking is not obvious.

Before servicing a Pressure Water Regulator, safety begins by relieving system pressure. Local codes often require a PRV when inlet pressure surpasses approved limits. The International Plumbing Code is commonly referenced for keeping household pressure below about 80 psi. For complex problems, disassembly-based adjustments, or code compliance concerns, hire a licensed plumber for diagnosis and safe replacement of a Pressure Regulator Valve or House Water Pressure Regulator.

Final Thoughts

A well-installed Pressure Water Regulator helps keep household pressure within the 40–60 psi range. This protects pipes, fixtures, and appliances while saving water. Regular gauge checks and small seasonal adjustments are important. Regular leak inspections can also improve regulator performance and extend its useful life.

For irrigation and drip systems, choose a regulator that matches flow and outlet pressure needs. Where possible, install it after the filter and in the correct relationship to timers or control valves. For multi-zone systems, placing a pressure limit valve before control valves can help maintain steady operation. Make sure the device meets minimum flow requirements to avoid erratic pressure.

Most Whole House Pressure Regulator units are designed to be set-and-forget and may last 10–15 years. Even so, monthly monitoring and yearly inspections are wise. Replace any Water Pressure Regulator that fails to adjust, cannot maintain pressure, or shows damage. For code concerns, recurring symptoms, or uncertain diagnosis, consult a licensed plumber.

Using quality parts and compatible replacements from trusted suppliers improves reliability and maintenance ease. With proper sizing, the right regulator, and simple routine care, your home and garden plumbing can run more efficiently.
Related: Pressure Washing Estimates Near Medford OR

Soda Gun For Home Use Review

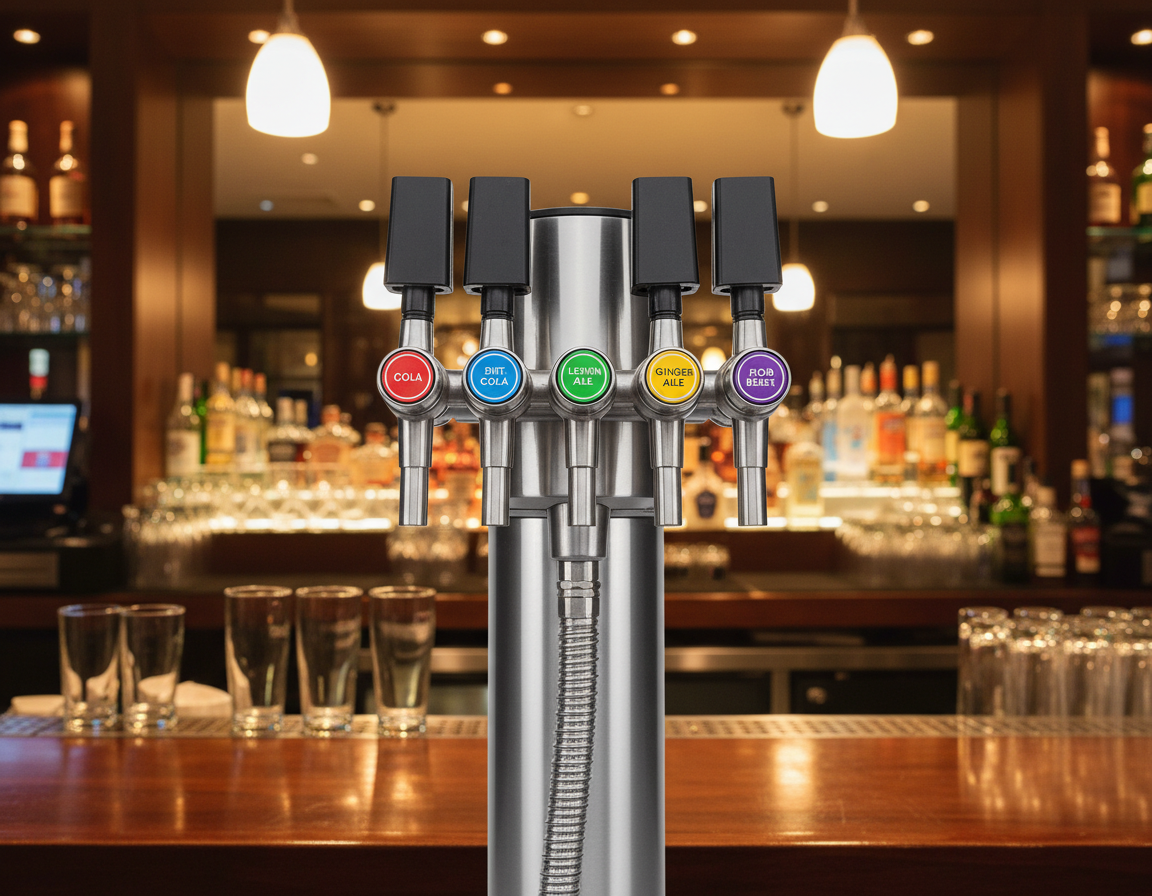
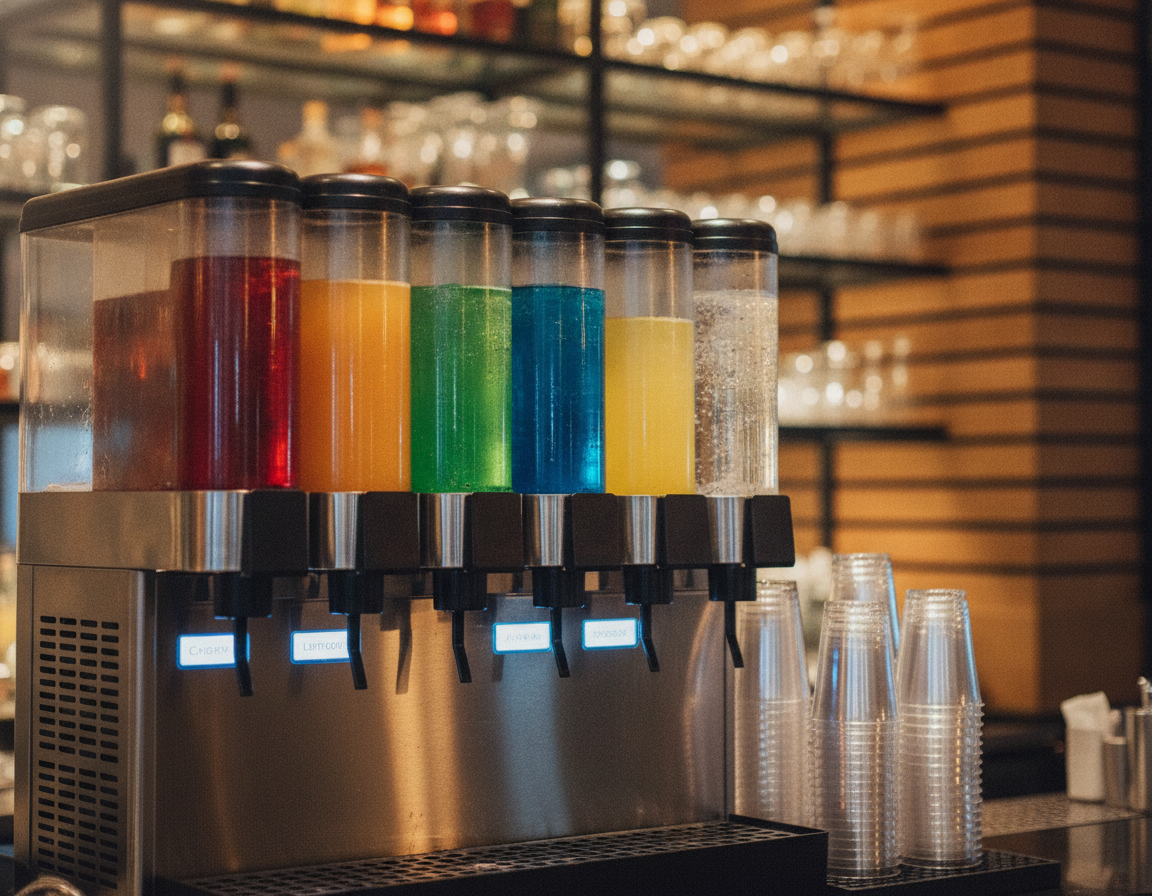
For upscale restaurants, busy bars, and traditional diners, serving dependable drinks starts with the right beverage equipment. A Bar Soft Drink Dispenser or Bar Soda Dispenser helps improve service, cut down guest wait times, and keep staff focused on customers. This is instead of constantly restocking bottles and cans.

Combining a Bar Soda Machine with bag-in-box BIB syrups delivers significant cost and space benefits. Five-gallon BIBs connect via tubing to the Soda Dispenser For Bar or the Bar Gun Dispenser. As syrup is dispensed, the bag shrinks, minimizing waste and ensuring every last drop is used.

Utilizing a Soda Gun For Bar and compact dispensers also reduces the cost per ounce compared to canned or bottled drinks. This setup usually means fewer deliveries and less packaging waste. It also saves storage space and reduces clutter in cramped kitchens, service stations, and busy bar areas.

This guide walks through mounting styles, cooling options, carbonation choices, syrup compatibility, sanitation, maintenance, troubleshooting, installation basics, and cost considerations. It also highlights reliable suppliers such as Installation Parts Supply for sourcing parts and building an efficient dispenser setup.

Why Invest In A Soda Dispenser For Your Bar Or Restaurant

Adding a Soda Gun System can improve service efficiency in a busy venue. It avoids the constant need for staff to grab bottles or cans, which saves valuable time. By mounting the Bar Soda Gun System behind the bar, bartenders can prepare more drinks with fewer steps.

For high-traffic venues, a Soda Gun Bar setup is extremely useful. It helps protect clear counters and keeps service lines moving faster. Training staff on each Bar Dispenser Gun helps ensure consistent drink quality, portion control, and flavor balance. This results in faster service and reduced wait times during busy periods.

Switching to bag-in-box syrups can produce substantial cost savings over bottled sodas. One BIB may hold up to five gallons, which cuts cost per ounce and reduces purchase frequency. When BIBs are paired with a Soda Gun System and a well-organized rack, replacements become faster and downtime is reduced.

Adopting BIBs and CO2 cylinders also lowers packaging waste and storage needs. A Bar Soda Gun System allows compact storage for syrup boxes, cylinders, and related parts. Full-squeeze racks and gravity-feed setups improve product extraction, reducing waste.

Choosing the right Bar Dispenser Gun and finishing the Soda Gun Setup with proper parts strengthens long-term efficiency. The result is a more organized workspace, fewer deliveries, less waste, and stronger alignment with sustainability goals for bars and restaurants.

Commercial Bar Soda Gun System

Understanding Bar Soft Drink Dispenser

Choosing the right equipment begins by understanding how it works. A Bar Soft Drink Dispenser blends carbonated water with flavored syrup, ensuring consistent drinks. It consists of dispensing valves, syrup lines, a CO2 supply, and a carbonator. A cooling system, like an ice bank or direct refrigeration, is also essential.

Syrup delivery usually runs through bag-in-box containers connected by tubing. The nozzle style must fit the BIB connector, and adapters are sometimes required. Valves may be push-button or lever style, while lighting, labels, and graphics can improve the dispenser’s appearance.

What each unit is best for

A Soda Fountain is a large unit with multiple valves and integrated cooling. It is perfect for high-throughput stations. On the other hand, a Soda Gun is a handheld dispenser ideal for bartenders. The Soda Siphon, once used to carbonate water, is now mostly specialty.

Installation requirements vary from unit to unit. A Soda Fountain calls for countertop or cabinet space and proper cooling. A Soda Gun requires organized tubing and easy cleaning access. Although the Soda Siphon is compact, it lacks the volume, control, and efficiency of modern dispensing systems.

Use cases differ across the foodservice industry. Bars often choose Soda Guns for fast mixed-drink preparation. Restaurants and fast-food outlets choose Soda Fountains for self-serve lanes. Diners and convenience stores install countertop units with ice bins for efficiency. Food trucks and mobile vendors often select compact portable dispensers because they are flexible.

Mounting Styles And Types Of Soda Machines

Selecting the right soda equipment improves smooth service and a better guest experience. Models vary by size, installation needs, and mobility. Below, we explore common options and offer practical advice for making the right choice.

Countertop Models: Portability And Best Use Cases

Countertop Soda Machines rest on existing surfaces and plug in easily. They work well for compact venues, food trucks, catering events, and pop-up service. Their easy movement makes them especially practical for temporary or flexible operations.

These machines are usually easy to clean and reposition during busy periods. They can also be useful for home use, events, or seasonal beverage programs.

Drop-In Soda Machines: Integrated Look For Premium Venues

Drop-in Soda Machines typically require a counter cutout and secure installation. They create a professional appearance that suits fine dining rooms, polished bars, and high-volume venues.

They often come with under-counter racks for bag-in-box syrup and external carbonators. When a service station needs a seamless appearance and greater ice capacity, a drop-in unit is often the strongest choice.

Choosing A Bar Gun Or Built-In Fountain

Bar Gun Soda systems work well when space is limited or bartenders need a handheld dispenser for mixed drinks. They deliver multiple beverages from one point, speeding up craft cocktail service.

Built-in fountains are better for self-serve areas, front-of-house drink lines, or high-volume stations where many guests pour drinks. Choose a fountain for multiple valves, flavor shots, and a polished fixture that blends with the bar.

Feature Countertop Soda Machine Drop-In Dispenser Bar Gun System
Installation Simple plug-in setup with no counter cutting Built-in installation with counter modification Mounted holster or wall bracket, simple hook-up
Mobility High, because it is easy to relocate Limited because it is built into the counter Moderate — handheld but tethered to lines
Common uses Food trucks, pop-ups, small cafes High-volume venues and polished service areas Busy cocktail bars, mixed-drink service, tight stations
Residential suitability Can work well for Soda Gun For Home-style setups Usually uncommon for residential use Soda Gun System For Home options available for hobbyists
Cleaning and upkeep Easy access for cleaning and updates Needs under-counter access panels Needs daily cleaning and tubing checks

Evaluating Valves, Ice, Carbonation, And Cooling Features

Choosing the right hardware is essential for drink quality, speed, and maintenance. It is important to consider how Dispensing Valves, cooling methods, and carbonation interact. Small differences in a Soda Gun Nozzle or Cold Plate For Soda Gun can affect daily performance, cleaning needs, and reliability.

Dispensing valves are generally available in two common styles. Push-button valves provide consistent portions and are useful for self-serve stations. Lever valves provide more flow control and are often easier for bartenders to clean and manage.

When planning valve counts, consider your menu. More valves support multiple sodas and flavor shots. It is also important to match nozzle type to your supply. Twist-lock and o-ring Soda Gun Nozzle designs use different Soda Gun Parts for cleaning, repair, and replacement.

Ice setup is key to cooling and service flow. Top-mounted ice bins provide quick access and can add passive cooling for beverage lines. Drop-in ice bins below the counter can reduce contamination risk while keeping ice close for staff.

Keep ice bins closed when not in use. Use dedicated scoops, and do not store bottles, tools, or other items in the ice bin if you want to avoid warm or flat drinks. An Ice Bank can extend cooling time but needs steady ice supply and monitoring for bridging.

Carbonation choices affect capacity and maintenance. Internal Carbonator units fit smaller footprints and are suitable for moderate-volume operations. External Carbonator systems manage high demand and simplify repairs when parts fail.

Set CO2 pressure carefully and follow the recommended tank maintenance schedule. Proper regulator settings preserve consistent fizz and reduce complaints about flat beverages.

Cooling choices include ice bank cooling, cold plate cooling, and direct refrigeration. Ice bank cooling is economical and simple to service. Cold plate cooling chills liquids as they pass through the plate, making a Cold Plate For Soda Gun practical for busy bars. Direct refrigeration uses compressors for precise temperature control in larger systems.

Feature Ideal For Advantages Drawbacks
Push-button Dispensing Valves Guest-facing pour stations Portion control, speed, less waste Less flexible for craft drink service
Manual lever dispensing valves Bar service Manual control and convenient sanitation Consistency depends on operator training
Top ice bin Quick access, self-serve Quick access and line cooling support Higher contamination risk without care
Under-counter ice bin Back-bar and prep areas Lower guest contact and better hygiene Requires cabinet or counter space
Ice reservoir cooling Efficient beverage cooling Simple service and steady chilling Needs ice monitoring and management
Soda gun cold plate High-volume bars Fast chilling and compact footprint Costs more upfront and needs correct fittings
Direct Refrigeration Venues needing precise temperatures Precise control, reliable Needs more technical servicing
Built-in carbonator Small-footprint installations Compact and built into the system Lower peak demand capacity
Remote carbonator unit High-volume venues Better for peak demand and repairs Needs separate footprint
Soda Gun Nozzle & Soda Gun Parts Every bar gun setup Easy parts replacement when matched correctly Requires correct matching for reliability

Syrup System Compatibility And Setup Best Practices

Opting for the right syrup system is critical for both drink quality and service efficiency. Bag-in-Box Syrup offers large servings with less waste and a wide range of flavors. Options can include cola, lemonade, iced tea, mixers, and specialty craft blends. Proper installation and calibration are important for consistent flavor and lower waste during peak service.

Adopting a structured Soda Gun Setup is necessary to avoid issues like leaks and off-tastes. Start with the correct branded fittings, because Coca-Cola® and similar systems may require specific nozzles or connectors. When using third-party syrups, a BIB Adapter may be needed to make the syrup package compatible with the existing connector.

Bag-In-Box Benefits And Flavor Options

Bag-in-Box Syrup is commonly supplied in five-gallon bags that fit standard racks. This format lowers packaging costs and storage needs while providing a variety of flavors. Offering popular choices such as cola and lemonade, plus specialty concentrates, can increase add-on sales and menu variety.

Connecting Syrups: Nozzle Fit And Adapter Needs

Confirm Syrup Compatibility before buying syrups, connectors, or replacement parts. A mismatched Soda Gun Nozzle can lead to drips or poor flow. If syrup brands or connector styles differ, a BIB Adapter may be required. Use a dedicated rack and complete installation kit to keep pressure stable and tubing organized.

Ratio Calibration And Cross-Contamination Prevention

Set the water-to-syrup ratio according to the manufacturer’s instructions, commonly around 5:1 but varying by brand. Pour sample servings, taste test, and adjust until the flavor meets expectations. Regular checks are recommended to maintain consistent flavor during long shifts.

When possible, dedicate lines to single flavors to avoid cross-contamination. Flavor residues may remain inside tubing and affect future pours. If a line must be changed, flush it with water and draw a 24-oz serving to clear residue before normal service resumes.

Setup Task Why this matters Fast action
Confirm nozzle compatibility Prevents leaks and poor pour Use the correct nozzle or add the proper BIB Adapter
Set up the rack and kit properly Ensures steady pressure and neat plumbing Use a complete kit with clamps, hoses, and regulators
Adjust syrup ratio Affects flavor balance and customer satisfaction Adjust to manufacturer’s ratio, taste test, re-check weekly
Prevent cross-contamination Keeps flavors clean and avoids off-taste problems Keep dedicated lines or flush lines and draw a test pour
Regular service Extends system life and maintains flow quality Schedule technician inspections and replace worn fittings

Bar Soda Gun Parts, Sanitation, And Maintenance

A clean, well-serviced bar soda gun ensures fast service and consistent drinks. This section explains major components, daily cleaning, common faults, and practical fixes. It also shows where reliable Soda Gun Parts can be sourced for faster repairs.

Bar soda gun components

The main parts include a Bar Gun Nozzle, manifold, tubing, sheathing, Bar Gun Holster, and a Cold Plate For Soda Gun. Nozzles commonly use twist-lock or o-ring designs. Tubing and connectors link the gun to BIB syrup lines, water, and CO2 supply. Insulated lines running from the cold plate to the manifold help keep drinks cold.

Routine cleaning and sanitation steps

Start by washing your hands. Remove the Bar Gun Nozzle and soak it with the connectors in an approved sanitizer such as Kay-5® or a chlorine solution. Clean the holster, sheathing, and exterior surfaces. Let parts dry on a clean cloth before reassembly.

Empty and sanitize the ice bin, and always use dedicated ice scoops. Refill with cubed ice. After reassembly, wait 15–20 minutes and briefly run soda water through the system. Taste each beverage to confirm quality before service. Do not use the gun handle to break ice, and never store tools, bottles, or other items in the ice bin.

Troubleshooting common issues

Warm or flat drinks often suggest low ice, CO2 pressure problems, water-filter issues, or damaged line insulation. If no dispensing in 30 minutes, discard a 24-oz soda.

An off-taste or odor suggests missed cleaning, contaminated ice, expired water filters, or liquid in underground chases. Overly sugary or watered-down flavor may result from empty BIBs, incorrect CO2 regulator settings, or syrup ratios. Have a technician check the system if ratio problems continue.

Noisy carbonators may indicate a dry pump, low inlet water pressure, or a supply issue. Check the water supply, inlet pressure, and filter cartridges. Leaks or loose nozzles often result from improper reinstall or worn seals. Identify the nozzle type and soak stubborn seals in sanitizer to loosen them.

Sourcing soda gun parts and supplies

Major beverage manufacturers such as Coca-Cola® may provide replacement parts and technical support for branded systems. Independent suppliers stock common spares such as valve bodies, nozzle assemblies, thermometers, sanitary drip cups, and regulators.

Installation Parts Supply can be a practical source for fittings, hoses, clamps, Cold Plate For Soda Gun units, and plumbing components. Keep a small inventory of critical Soda Gun Parts and labeled connectors to simplify repairs and reduce downtime.

Cost, Customization, And Installation For The Right Soda System

When selecting a soda setup, start with a clear budget and a list of priorities. The Commercial Bar Soda Gun System Cost varies by the unit style, number of valves, and whether it has an internal or external carbonator. Costs can also rise when advanced cooling options such as direct refrigeration or a cold plate are included. Complex drop-in installations further add to the expense.

Consider additional items that affect the Soda Gun Machine Cost. CO2 tanks, regulators, piping, adapters for specific BIB connectors, and labor for cut-in installations all contribute. Remember to include ongoing expenses for BIB syrups, sanitizer, spare nozzles, and preventive maintenance in your budget for a Bar Soda Gun System.

Customization can improve guest satisfaction and help increase beverage sales. Adding flavor shots or additional valves lets staff create signature drinks and upsell premium beverages. Visual upgrades such as LED lighting, branded graphics, and recipe displays can attract attention and promote seasonal drinks.

Branded cups, straw dispensers, and dispenser wraps can create a unified station look. Use graphics that fit your hospitality brand to boost recognition and encourage repeat business.

Plan the installation with a clear kit in mind. A proper setup includes a slanted BIB holding rack, pressure regulators, clamps, suitable hoses and fittings, and cold plates for bar gun setups. Include adapters for common BIB connectors to ensure compatibility and reduce leak risks.

Professional installation is recommended for drop-in units and systems using external carbonators. Countertop models and many Bar Gun Dispenser setups can be assembled by trained staff or an experienced technician. Reserve space for CO2 tanks and ensure easy access for routine checks and maintenance.

When sourcing parts, seek specialists who carry fittings, cold plates, hoses, clamps, and installation kits. Installation Parts Supply provides many of these items, saving time when matching components to a specific Soda Gun Dispenser or Bar Gun Dispenser configuration.

Keep manufacturer resources from brands such as Coca-Cola Solutions available for cleaning guides, troubleshooting charts, and service contacts. These resources can speed up startup and reduce downtime when taste, flow, or carbonation issues occur in a Soda Gun System.

Conclusion

Choosing the right Bar Soft Drink Dispenser is critical for speed of service and beverage margins. A well-chosen Bar Soda Gun System, paired with bag-in-box syrups, cuts down on product cost. It also lowers packaging waste and boosts menu flexibility for cocktails and nonalcoholic drinks.

Before making a purchase, review the dispensing valves, ice and cooling types, carbonator capacity, and BIB compatibility. Regular tasks like calibrating the water-to-syrup ratio, sanitation, and maintenance ensure consistent flavor and carbonation. These steps are important for the long-term performance and life of a Soda Dispenser Gun.

Remember to budget for ongoing costs such as CO2, syrup, sanitizer, replacement nozzles, fittings, and parts. Rely on reputable suppliers and manufacturer support lines for parts and installation kits. With the right Bar Soda Dispenser and a solid maintenance plan, bars and restaurants can offer faster service, a wider drink menu, and increased profitability from their beverage offerings.

Related: How to Install a Soda Gun System in Your Commercial Kitchen

A Quick Review of Brass vs Stainless Steel 1 2 Male To 3 8 Male Adapter Links

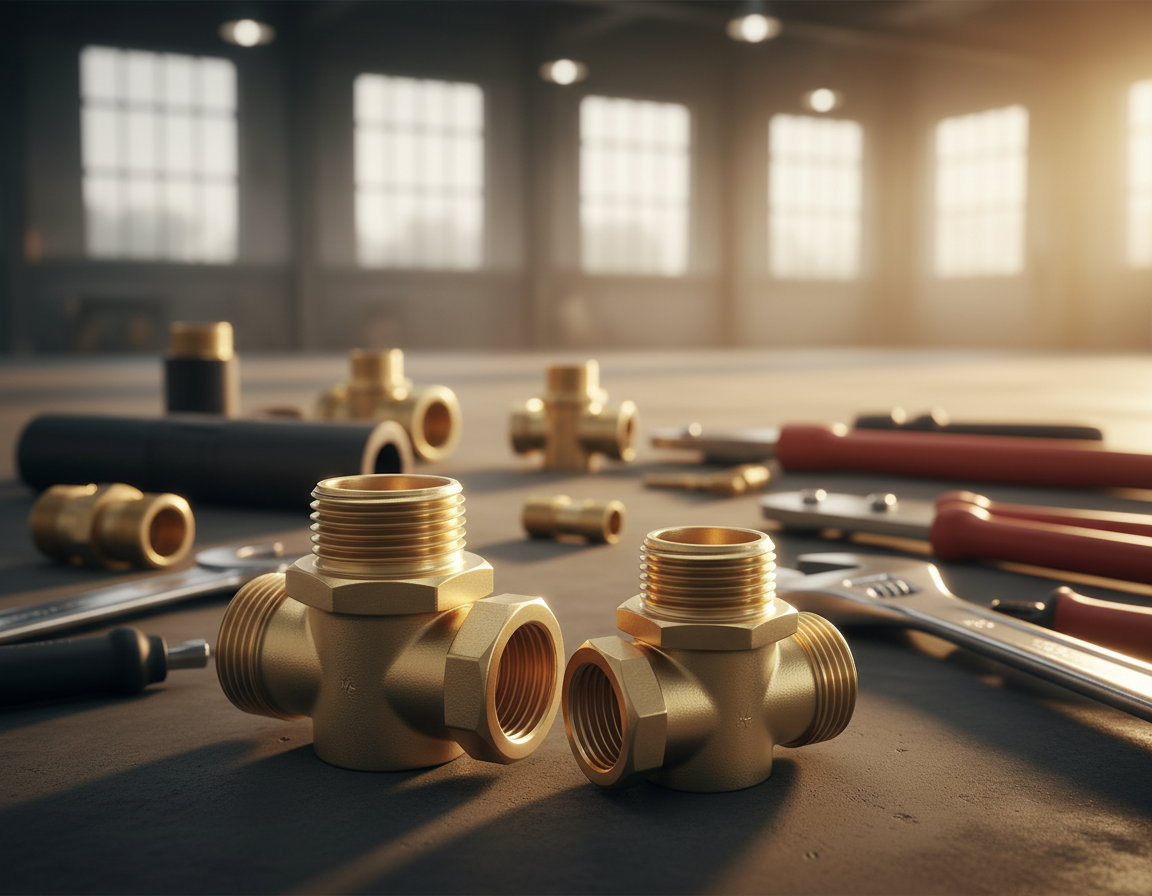
This helpful guide to Compression Adapters shows how they link tubing and small-diameter pipes for secure plumbing. The information is aimed at homeowners, professional installers, and people looking for job-ready components through Installation Parts Supply.


A compression adapter makes its seal when the ferrule is pressed against the tubing and fitting body, establishing a tight connection. They are commonly used in home, business, and industrial plumbing systems.

The article details the main styles, dimensions, materials, and recommended installation habits. It also addresses troubleshooting and application use cases. Special attention is given to 3/8-to-1/2 conversions and to correctly matching thread types like NPT and compression. Durability is reinforced with brass, copper, or stainless steel options.

It is wise to follow manufacturer torque and turn specifications. Use tubing inserts for soft tubing like PEX when necessary. Avoid mixing ferrules or fitting bodies from different brands to reduce leaks and galling.

Key Takeaways

  • A compression adapter seals when its ferrule is compressed onto the tubing.
  • Installation Parts Supply stocks common sizes and materials for most jobs.
  • Select materials—brass, copper, or stainless—based on pressure and environment.
  • When adapting 3/8 and 1/2 in. fittings, precisely match both size and thread type.
  • Adhere to manufacturer torque/turn specs and use inserts for soft tubing.

3/8 Male To 1/2 Female Adapter

Compression Adapters And Compression Fittings Explained

Compression adapters connect tubing by mechanically compressing a ferrule onto the tubing outer diameter. These fittings are different from threaded connectors and push-fit types in how they achieve a seal. Its seal is based on controlled metal deformation instead of mated threads or internal retention clips.

Below are concise explanations of each part and how they combine.

What Is A Compression Adapter And How It Differs From Other Fittings

A compression adapter is a type of compression fitting used to connect pipes or tubes without soldering. As the compression nut is tightened, it pushes the ferrule into the tapered fitting body. That approach is unlike threaded joints, which depend on matched threads and thread sealant. It is also different from push-fit fittings, which typically use rubber-like seals and retention clips for fast installation.

Main Components: Nut, Ferrule Olive, And Fitting Body

The three primary parts are the compression nut, the compression ferrule, and the compression fitting body. The nut creates axial force. The ferrule, sometimes called an olive, deforms to bite into the tubing. Inside the fitting body, a tapered bore guides the ferrule into its sealing position.

Certain designs add a rear ferrule that reduces seal stress and makes disassembly cleaner.

How Compression Adapters Form A Leak-Tight Seal

Tightening the compression nut drives the ferrule into the fitting body’s taper. This radial compression presses the ferrule against the tubing and creates a line-contact seal. Proper seating of the ferrule prevents leaks at normal system pressures and temperatures.

Compression fittings are often used on copper, brass, stainless steel, and many rigid plastic tubes. Before assembly, installers should confirm tubing compatibility and use the maker’s torque or turn-count guidance.

Component Job Main Benefit
Compression tightening nut Applies force to push the ferrule Controlled assembly and rework
Sealing ferrule Forms the tube-gripping seal Pressure-resistant seal at the tube
Fitting body Tapered bore that seats ferrule Reliable alignment and sealing surface
Optional rear ferrule Decouples nut torque from ferrule seal Improved reassembly with less tube damage

Common Sizes And Type Conversions For Compression Adapters

Switching between 1/2-inch and 3/8-inch tubing is a frequent task. Choosing the correct reducer or adapter is necessary. This helps ensure a proper fit based on tubing OD, thread type, and gender. Choosing the correct part avoids leaks, extra fittings, and unnecessary labor.

Half inch to three eighths adaptor options

For supply-line jobs, parts such as the 1 2 To 3 8 Reducer and Half Inch To Three Eighths Adaptor are regularly used. They change a 1/2-inch feed to a 3/8-inch inlet. These parts are available as single-piece reducers and two-piece compression adapters. This design keeps the tube seal. Always check if the listed sizes refer to tubing OD or nominal pipe size before making a purchase.

Adapters and reducers with differing genders

The gender of the fittings is critical for proper mating. When the mating component has a male thread, a 1/2 Female To 3/8 Male Adapter may be the correct choice. For the reverse arrangement, installers often use a 3/8 Female To 1/2 Male Adapter. Mixed systems may also require options such as 1/2 Male To 3/8 Female Adapter or 1/2 Male To 3/8 Male Adapter.

Compression-to-compression and compression-to-NPT fitting choices

Compression-to-compression parts, such as 1/2 Compression To 3/8 Compression adapters, continue a continuous compression seal. When connecting to threaded pipe systems, choose a 1/2 Compression To 3/8 NPT or a similar conversion fitting. When connecting to NPT, apply the correct thread sealant or PTFE tape to ensure a pressure-tight joint.

  • Review descriptions such as 1 2 X 3 8 Compression Adapter or 3/8 X 1/2 Adapter to confirm OD versus nominal size.
  • Confirm thread pitch and gender before cutting or buying replacement parts.
  • Buy from reputable suppliers such as Mueller, Parker, or Watts to reduce mismatch risk.

Choosing Compatible Materials For Compression Adapters

Material choice has a direct effect on how long the joint lasts. It is essential to match the fitting material with the tubing, pressure, and fluid type. This supports a leak-free, corrosion-resistant, and galling-free connection. For applications involving corrosive or high-purity systems, a 3 8 Male To 1 2 Female Stainless Steel option is often the most reliable.

Brass, copper, and stainless steel are the primary materials for most applications. Brass adapters generally fit common needs in potable-water and general plumbing systems. Copper fittings are often used with copper tubing and soldered pipe runs. Stainless steel provides excellent corrosion resistance and durability for high-pressure, chemical, or aggressive environments.

Compression joints perform best with hard tubing like copper, stainless steel, nylon, and PEEK. Flexible tubing like PEX may also be used when a correctly sized tubing insert is installed. These inserts prevent the tube from collapsing and ensure the ferrule bites properly.

PTFE tubing is highly chemical-resistant and flexible but prone to PTFE cold flow under clamped loads. To reduce that risk, choose fittings with secondary seals, internal O-rings, or back-up support features. Regularly inspect connections when using PTFE in compressed joints.

The choice of ferrule is important for seal reliability. Metal ferrules in brass or stainless steel offer stability across a wide temperature range. Single-piece ferrules are appropriate for softer tubes. Two-piece ferrule systems deliver more control and can reduce galling by separating the front-ferrule and rear-ferrule functions.

Cone-profile asymmetrical ferrules can maintain consistent seals in precision assemblies. They fix orientation. Symmetrical ferrules are simple to assemble, although they may move on some hard plastic tubing. Choose the ferrule geometry based on tubing stiffness and service demands.

When selecting materials, consider the pressure, temperature, and media involved. For high-pressure, high-purity, or aggressive fluid service, choose stainless components with compatible ferrules. In routine domestic plumbing, brass compression adapters and copper compression fittings often deliver affordability, availability, and performance.

Best Practices And Mistakes To Avoid During Installation

A reliable installation begins on clean, square-cut tubing and correctly matched components. Adhering to best practices reduces leaks and rework. A simple pre-assembly checklist can avoid wasted fittings and tubing.

Preparing Pipe Ends: Cutting, Deburring, And Cleaning

Use a quality cutter to create clean, square tubing cuts. Crooked or uneven cuts can trigger leaks. A deburring tool clears burrs, sharp edges, and metal fragments.

Clean the ends with a lint-free cloth to remove oil, dirt, and metal dust. When using soft tubing such as PEX, fit a rigid insert that matches the tubing ID. This allows the ferrule to seat properly. Cutting, deburring, and cleaning are necessary steps for a dependable compression seal.

Proper Tightening: Distance Turns Versus Torque And Avoiding Over-Tightening

Follow the manufacturer’s recommended turns after a finger-tight fit. Counting turns coordinates compression with ferrule geometry better than torque readings. Thread pitch is mechanically linked to how much the ferrule compresses.

Avoid over-tightening to prevent ferrule flattening and broad surface contact, which can lead to leaks. With stainless fittings, use controlled torque to reduce galling. Use isopropyl alcohol as a temporary aid only if permitted by the maker.

When To Reassemble Or Replace Compression Ferrules

Most compression fittings can be taken apart a limited number of times. Ferrules often swage onto tubing after the first installation and may not reseal correctly if reused. Inspect the ferrule for deformation if you remove a fitting.

Replace ferrules showing signs of work-hardening, cracking, or poor seating. If the fitting has been repeatedly assembled and removed, replace the ferrule and consider replacing the fitting body to restore a leak-tight joint.

Frequent errors include mixing brands, skipping inserts on soft tubing, confusing compression threads with NPT, and failing to cut, deburr, and clean correctly. Correcting these problems reduces call-backs and improves long-term system performance.

Identifying The Right Adapter: Keyword-Focused Selection Guide

Choosing the right adapter begins with precise search terms and a thorough part description review. Utilize specific phrases to find the exact match, preventing the need for returns. Useful search terms may include 3/8Th To 1/2 Adapter and 1 2 X 3 8 Compression Adapter when you need faster catalog results.

Important description details include fitting gender, diameter, and thread type. Listings such as 1/2 Female To 3/8 Male Adapter or 1 2 To 3 8 Compression Adapter signal which side accepts tubing or pipe. Always verify whether the diameter refers to tubing OD or nominal pipe size.

Utilizing search variants is important when suppliers employ different naming conventions. Try 3/8 X 1/2 Adapter, 3 8 To 1 2 Compression Adapter, or 3/8Th To 1/2 Adapter to find compatible parts across various catalogs. Suppliers such as Installation Parts Supply and Grainger may catalog the same fitting under several names.

The adapter’s orientation must match the components it connects to. A male-to-female piece, such as 1 2 Male To 3 8 Female Adapter, is appropriate for connecting a rigid run to a hose or supply line. Female-to-female adapters are used when two male-threaded parts need to be joined.

Use extra care with hybrid fittings that mix different thread types. A 1/2 Compression To 3/8 NPT or a 1/2 Female Compression To 1/2 Male NPT combines compression and pipe thread on opposite ends. Use thread sealant only as specified by the manufacturer.

Material selection is essential for corrosion resistance and compatibility. Brass and stainless steel are preferred options. Check compatibility with copper, PEX, or PTFE tubing, and avoid galvanic corrosion when different metals are mixed.

When uncertain, cross-check part numbers and review product photos closely. Using keywords such as 3/8Th To 1/2 Adapter, 1 2 X 3 8 Compression Adapter, 1/2 Female To 3/8 Male Adapter, 1 2 To 3 8 Compression Adapter, 3 8 To 1 2 Compression Adapter, and 3/8 X 1/2 Adapter can improve the search for the right match.

Troubleshooting Compression Adapter Leaks And Performance Problems

Compression-connection leaks and pressure loss should be handled with a step-by-step process. Start with a visual inspection, then use simple checks to identify the problem. Always prioritize safety when working with live systems.

Common Causes To Diagnose

First, inspect the ferrule for uneven marks or gaps. Look for nuts that are roughly engaged. Confirm that the tubing is square-cut and fully inserted into the fitting. Make sure the adapter type suits the system so thread mismatches are avoided.

Diagnostic Checks To Follow

  • Look closely to confirm the ferrule is seated and the nut is properly engaged.
  • Rotate the nut slightly to feel for smooth engagement; roughness may indicate damaged threads.
  • Measure tubing diameter and check for surface roughness or ovality that can prevent a seal.
  • Before returning the system to service, pressure-test the connection at low pressure.

Practical Leak Fixes

If a joint appears loose, retighten to the recommended specification. Do not over-tighten, because excess force can flatten the ferrule.

For swaged, scored, or distorted ferrules, replace them along with the nut and fitting body if necessary. Do not mix ferrules and bodies from different manufacturers; mismatched taper or geometry can break the seal.

For soft tubing, fit an internal tubing insert sized to the pipe to stabilize the wall and improve sealing. In corrosive environments, switch to stainless steel fittings to extend service life.

Managing PTFE Cold-Flow And Creep

Preventing PTFE cold flow requires specific sealing strategies. Use fittings with internal O-rings, redundant seals, or mechanically backed ferrule designs that resist creep.

Schedule periodic inspections because cold-flow can develop over time even after a correct installation. If PTFE tubing shows deformation, replace it and consider using a secondary or backup sealing method.

Problem Initial Inspection Best Action
Weeping at nut Loose nut; visible gap at ferrule Tighten to specification; replace ferrule if leaking continues
Leak appears only under pressure Oval tubing or poor ferrule seating Square-cut tube, install tubing insert, replace ferrule
Gradual seepage Inspect for tubing creep, collapse, or cold-flow Apply PTFE creep controls; use reinforced tubing or O-ring backup seals
Rough thread engagement Rough engagement when tightening Replace nut or fitting body; retighten to spec on new parts
Rust, pitting, or material breakdown Inspect for rust, pitting, or discoloration Use corrosion-resistant fittings and matching ferrules

Application Considerations And Use Cases

Compression adapters are useful for various tasks around the home. They commonly adapt supply tubing to faucet, toilet, and fixture inlets. For instance, a sink supply line adapter is helpful when the sizes of sink posts or faucet inlets differ.

Home installations often involve sink and faucet supply lines, toilet connections, and appliance hookups. A water heater compression adapter is valuable for replacing an old tank or connecting a new valve. Choose parts rated for household water pressure and make sure the ferrule material works with the tubing.

In commercial and industrial settings, the requirements are more stringent. High-pressure compression fittings may be used in process lines, bottled gas systems, and HVAC equipment. For demanding applications, stainless ferrules and two-piece ferrule designs can withstand creep, corrosion, and vibration.

Instrumentation and high-purity systems need fittings that control contamination, out-gassing, and unwanted residue. Select materials compatible with sterilization conditions and clean-room environments. Ensure the pressure ratings and traceability are met when selecting components for lab or medical equipment.

Combining parts from different manufacturers can create sealing problems. Differences in ferrule taper, thread pitch, or ferrule length can block proper sealing. It is best to purchase fittings and ferrules from the same vendor or confirm compatibility through Installation Parts Supply or the manufacturer’s data.

When sourcing parts, carefully check product pages for exact outer diameter, thread pitch, and material. That step reduces surprises in the field. Proper selection is key to preventing leaks and extending the service life of both residential and commercial installations.

Compression Adapter Summary

Compression adapters are important for joining and converting tubing, provided you select the right one and install it properly. Understanding the basic components—nut, ferrule, and body—is key. This knowledge helps in matching sizes, genders, and thread types, such as a 3/8 to 1/2 converter or a 1/2 female to 3/8 male adapter.

Adapter material is another major selection factor. Brass and stainless steel are well suited for high-pressure and harsh chemical environments. Copper is often effective for many household and residential plumbing applications.

Follow proper installation methods. Ensure square cuts and deburr the tubing. Use inserts for soft PEX or nylon tubing. Tighten by the recommended turns, avoiding excessive force.

When troubleshooting, check ferrule seating and thread condition. Replace swaged ferrules after disassembly. For PTFE applications, consider redundant seals, backup sealing methods, or alternative materials to prevent cold-flow.

When buying fittings, use reliable suppliers and detailed product specifications. Recommendations from Installation Parts Supply can support compatibility. They offer a wide range of adapters, reducers, and conversion fittings. Choosing the right parts and following proper installation techniques will reduce leaks and extend system lifespan.

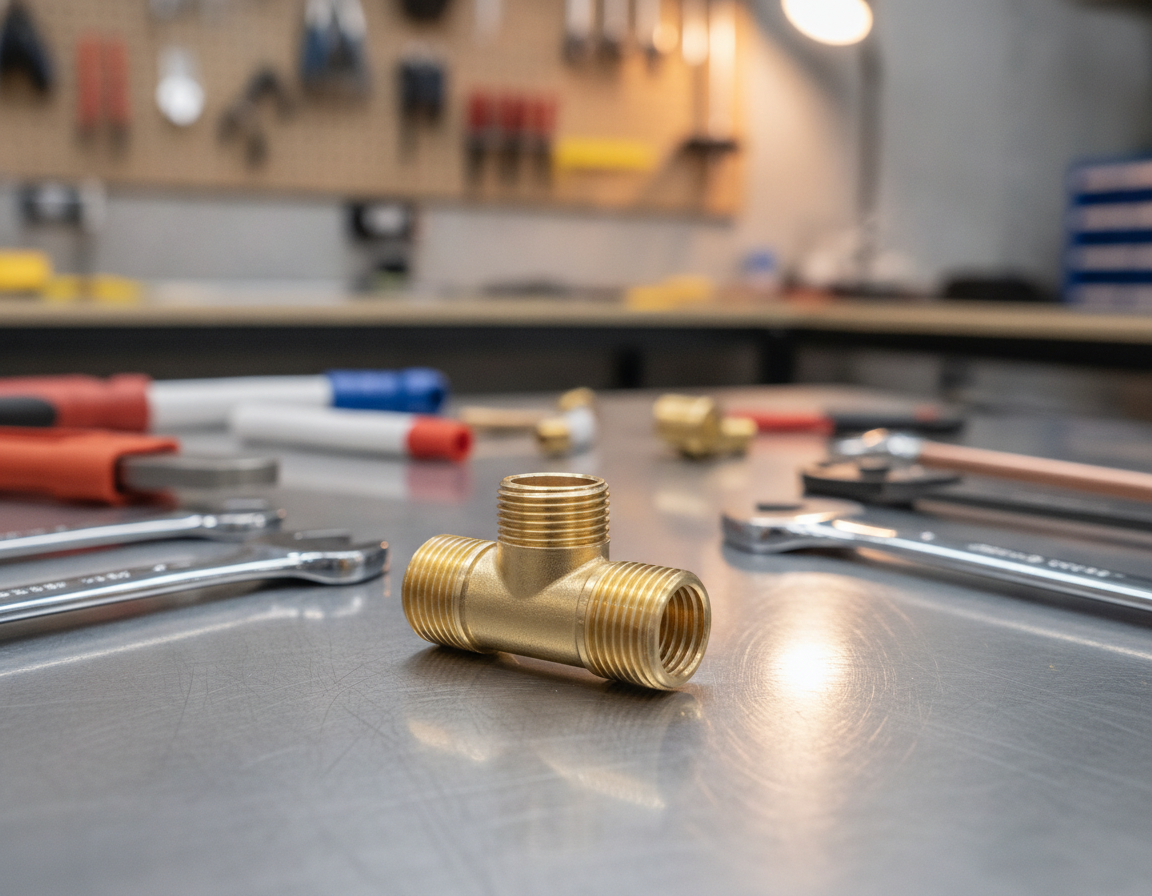
Related: Why a 1 2 T Fitting is a Staple in Every Plumber’s Kit

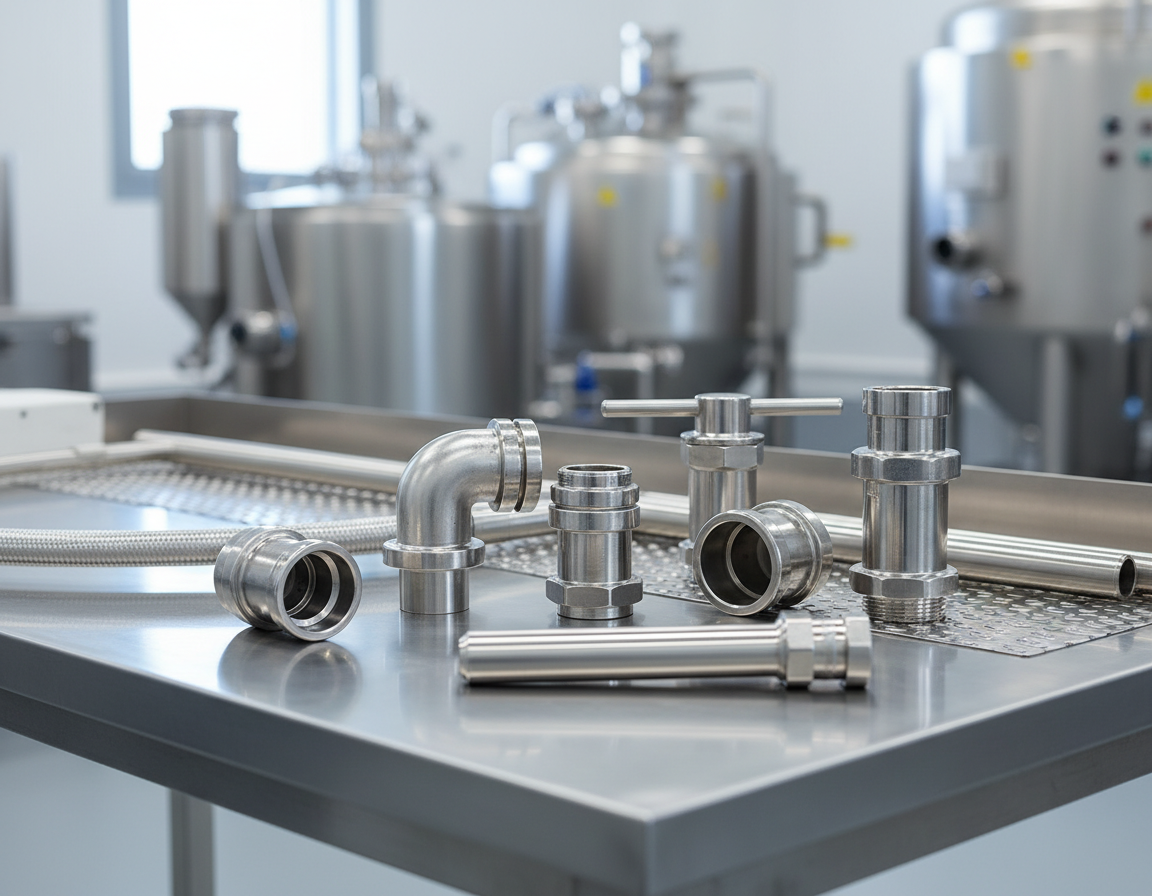
Why Food Processing Facilities Buy Sanitary Fittings from Installation Parts Supply

In sanitary process systems, the quality of your fittings has a direct effect on performance, safety, cleanliness, and regulatory compliance. Whether you’re operating a brewery, dairy processing facility, pharmaceutical plant, food manufacturing operation, or hygienic processing system, choosing the right sanitary fittings supplier is critical.

For businesses seeking premium sanitary fittings, Installation Parts Supply has built a reputation as one of the most trusted and reliable sources in the industry. With an impressive range of stainless steel sanitary fittings, expert product knowledge, and a focus on quality, Installation Parts Supply provides the products and support professionals need to keep operations running efficiently.

What Exactly Are Sanitary Fittings?

Sanitary fittings are piping components designed for hygienic applications where cleanliness, product purity, and contamination prevention are critically important. These fittings are commonly used in industries such as:

Sanitary Fittings

  • Food-processing operations
  • Drink production
  • Commercial and craft brewing
  • Milk and dairy production
  • Pharmaceutical manufacturing
  • Biotechnology
  • Personal-care manufacturing
  • Chemical production

Rather than using basic industrial fittings, sanitary fittings are designed with smooth internal surfaces, polished finishes, and cleanable designs that help reduce bacterial growth and product contamination.

Typical sanitary fitting options include:

  • Tri-Clamp fittings
  • Sanitary elbows
  • Sanitary tee fittings
  • Reducers
  • Sanitary ferrules
  • Sanitary adapters
  • Pipe end caps
  • Sight glasses
  • Sanitary ball valves
  • Sanitary check valves
  • Sanitary gaskets and seals

These parts combine to create hygienic process systems that meet strict industry standards.

Why Installation Parts Supply Is The Best Place To Buy Sanitary Fittings

Extensive Selection Of Sanitary Fittings

A major benefit of buying from Installation Parts Supply is access to a large range of sanitary process components.

Buyers can source:

  • Stainless steel process fittings
  • Tri-Clamp fittings
  • Hygienic tubing accessories
  • Hygienic valves
  • Ferrules plus fitting adapters
  • Sanitary clamps
  • Replacement seals
  • Brewery process fittings
  • Dairy process components
  • Pharma-grade fittings

Having a wide product range available from one supplier simplifies purchasing and reduces procurement delays.

Reliable Stainless Steel Components

Sanitary systems often operate in demanding environments involving pressure, temperature fluctuations, cleaning chemicals, and strict sanitation requirements.

Installation Parts Supply provides high-quality sanitary fittings manufactured from corrosion-resistant stainless steel materials designed for lasting reliability.

Benefits include:

  • Excellent corrosion resistance
  • Easier cleaning and sanitation
  • Long-lasting use
  • Polished internal surfaces
  • Help with contamination reduction
  • Compatibility with CIP systems

For industries where product purity is essential, material quality is important.

Trusted By Multiple Industries

Installation Parts Supply supplies customers across numerous industries that depend on hygienic process equipment.

Food Processing

Food production facilities depend on sanitary connections that support safe production environments while helping maintain compliance with industry regulations.

Brewing Industry

Craft breweries and commercial brewing facilities rely heavily on Tri-Clamp fittings and sanitary process components to support consistent product quality and simplify cleaning procedures.

Dairy Manufacturing

Milk, cheese, yogurt, and other dairy products require equipment that complies with strict sanitary standards.

Pharmaceutical Manufacturing

Pharmaceutical operations need precision-engineered sanitary fittings that support sterile production environments and regulatory compliance.

Biotech Applications

Biotech manufacturers depend on reliable sanitary connections that help maintain purity throughout sensitive manufacturing processes.

Why Many Professionals Choose Tri-Clamp Sanitary Fittings

Tri-Clamp fittings have become the industry standard for many hygienic applications.

Common benefits include:

  • Fast installation and removal
  • Reliable leak-resistant connections
  • Easy inspection
  • Simplified maintenance
  • Suitability for CIP cleaning processes
  • Shorter maintenance interruptions

Installation Parts Supply provides a wide range of Tri-Clamp fittings, clamps, gaskets, and accessories to support almost any sanitary process system.

Expert Support And Product Knowledge

No two sanitary systems are exactly alike.

Finding the correct fitting requires consideration of:

  • Tube size
  • Operating pressure needs
  • Temperature ranges
  • Material and product compatibility
  • Sanitation procedures
  • Industry regulations

Installation Parts Supply assists customers identify the proper components for their specific applications, helping reduce the risk of costly mistakes.

This kind of product knowledge is often difficult to find through general online marketplaces.

A Better Choice Than General Marketplaces

Some buyers start with large online marketplaces when searching for sanitary fittings. However, specialized suppliers offer several important advantages:

Selection Factor Installation Parts Supply Advantage Large Marketplace
Hygienic Product Expertise Deep Often limited
Product Range Focused Inconsistent
Application Knowledge High Less specialized
Technical Guidance Accessible Limited
Hygienic Process Focus Strong Seller dependent
Consistent Product Quality Dependable Seller Dependent

For critical sanitary applications, specialized knowledge can make a meaningful difference.

Where To Use Sanitary Fittings

Installation Parts Supply supplies customers working with:

  • Food process lines
  • Beverage production systems
  • Brewery equipment
  • Distilling systems
  • Dairy process facilities
  • Pharmaceutical facilities
  • Biotechnology facilities
  • Water treatment systems
  • Cosmetic manufacturing
  • Chemical-processing systems

Every application needs reliable sanitary connections that support both performance and cleanliness.

What To Consider When Purchasing Sanitary Fittings

Before purchasing sanitary fittings, consider the following factors:

Quality Of Material

Choose high-grade stainless steel construction that resists corrosion and supports extended service life.

Internal Surface Finish

Clean, smooth inner surfaces help reduce contamination risks and improve cleanability.

Compatibility

Ensure fittings match your tubing, valves, and process equipment.

Regulatory Requirements

Confirm components meet the standards required by your industry.

Technical Supplier Support

Choose a supplier that understands sanitary processing systems and can provide guidance when needed.

Installation Parts Supply meets these important requirements, making it a reliable supplier for sanitary process components.

Sanitary Fittings FAQs

Which Industries Use Sanitary Fittings Most Often Used?

Sanitary fittings are often found in food processing, beverage production, brewing, dairy manufacturing, pharmaceutical production, biotechnology, cosmetics, and chemical processing.

Why Choose Stainless Steel Sanitary Fittings?

Stainless steel provides corrosion resistance, durability, cleanability, and compatibility with hygienic processing environments.

How Do Tri-Clamp Fittings Work?

Tri-Clamp fittings function as sanitary fittings that allow easy assembly, disassembly, cleaning, and maintenance of hygienic process systems.

Why Buy Sanitary Fittings From Installation Parts Supply?

Installation Parts Supply offers a broad inventory, industry expertise, high-quality products, and dedicated support for customers working in sanitary processing applications.

Summary

For operations built around hygienic process systems, selecting the right sanitary fittings supplier is nearly as critical as selecting the right fittings themselves.

Installation Parts Supply is a strong choice thanks to its extensive inventory, high-quality stainless steel components, industry expertise, and commitment to supporting customers across food processing, brewing, dairy, pharmaceutical, and biotechnology industries.

Whether you need Tri-Clamp fittings, sanitary valves, ferrules, adapters, clamps, gaskets, or complete sanitary process solutions, Installation Parts Supply provides the quality products and knowledgeable support professionals trust for everyday operations.

When searching for the best place to buy sanitary fittings, Installation Parts Supply continues to be a reliable option for businesses that value performance, reliability, and hygienic excellence.

Related: Selecting Spare Parts for a Fiber Ribbone Line

The History of Oetiker Tool Corporation in Tool Innovation

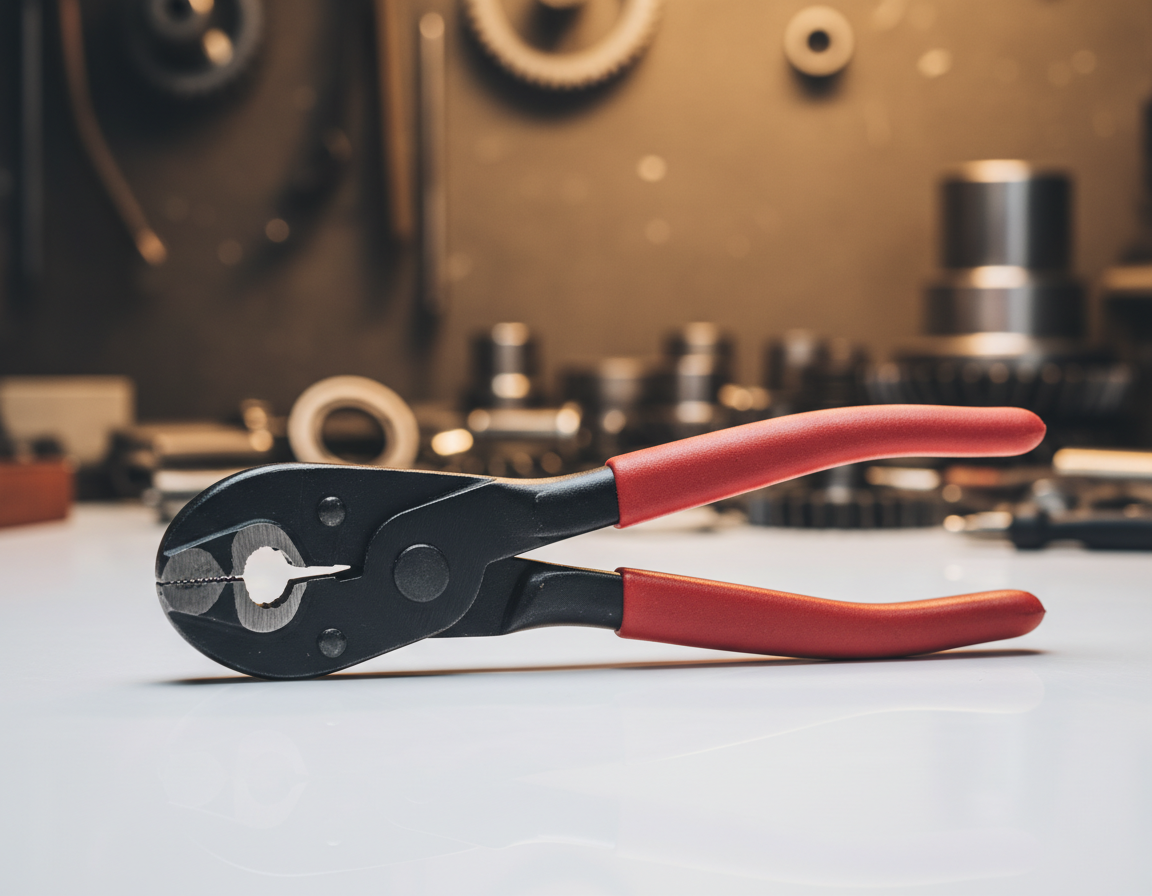
More than 70% of service calls for leaking hose connections are due to poor clamp installation. The right Oetiker Clamp Pliers Tool can address this problem effectively. The Oetiker tool is a specialized pliers tool designed for ear-style clamps. It creates a permanent, low-profile seal on barbed fittings and hoses. Unlike generic pliers, it delivers consistent, repeatable crimps. This reduces leak issues and extra rework in various fields, including plumbing, beverage draft systems, and automotive hoses.

See details about Oetiker Tool
Trade professionals looking for the best oetiker pliers need practical, clear guidance. They want to know how to size clamps, crimp correctly, and which brands are durable. Stainless steel Oetiker clamps and sizing charts are available from trade suppliers and specialty distributors. Installation Parts Supply is a trusted source for clamps and oetiker tools in the plumbing wholesale market.

Understanding Oetiker Clamps And How They Work

Oetiker clamps are low-profile, ear-style bands designed to form a secure, lasting seal around hoses and barbs. They are precision formed and stamped from stainless steel for strength and corrosion resistance. These clamps are common in plumbing, beverage draft systems, and automotive applications where a compact, tamper-resistant connection is needed.

Oetiker Clamp Design And Materials

Most Oetiker clamps are made from stainless steel, often 301 or 304 grades, to prevent corrosion in wet conditions. The construction uses a continuous band with an integral ear that can be crimped. This stamped, formed construction creates a consistent profile and even contact around the hose and barb.

This low-profile design allows the clamps to fit in tight spaces. Uniform contact reduces localized stress that can damage softer hose materials. Stainless steel versions are the standard choice for draft beverage systems and plumbing where corrosion must be minimized.

Ear-Style Clamp Mechanism And Why It Provides A Permanent Seal

The ear is compressed using a dedicated tool that deforms the ear and reduces the clamp diameter. A proper crimp creates uniform radial pressure that squeezes the hose against the fitting. This mechanical deformation makes the joint tamper-resistant and permanent.

Once crimped, the ear cannot be re-tightened like a screw clamp without cutting the clamp off and replacing it. This permanent design is valuable for safety-critical lines and sanitary systems. Using the correct oetiker ear clamp tool or oetiker clamp pliers tool ensures uniform crimps and dependable seals.

Common Uses In Plumbing, Beverage Draft Systems, And Automotive Hoses

In beverage draft systems, stainless Oetiker clamps maintain clean, corrosion-resistant hose connections. Distributors and suppliers often offer starter kits and sizing guides tailored to kegerator and bar installations.

In plumbing and HVAC, these clamps are used on PEX, rubber, and multilayer hoses where a permanent, low-profile connection is preferred. In automotive work, they secure fuel lines, vacuum hoses, and coolant connections where vibration resistance and space savings matter.

Oetiker Marlette MI

Application Typical Material Why Oetiker Is Effective Recommended Tool
Beverage draft systems Stainless steel 304 Sanitary performance, corrosion resistance, low profile oetiker clamp tool
Residential plumbing Stainless steel 301/304 Reliable seal on PEX and rubber hose lines oetiker installation pliers
Automotive hoses Treated stainless steel Vibration resistance and compact fit oetiker hose clamp tool

Oetiker Clamp Pliers Tool

The right tool is essential for a secure, permanent hose connection. An oetiker tool is designed to create the ear profile on ear-style clamps. These clamp pliers offer a specialized jaw shape and leverage, ensuring a uniform crimp with each use.

Its Purpose And How It Differs From Standard Pliers

Oetiker clamp tools feature contoured jaws that mirror the ear’s geometry. This design prevents slipping and ensures even compression. Professionals opt for tools like Beta clamp pliers, which reduce hand fatigue and maintain alignment during repeated use. Unlike standard pliers, oetiker tools provide the precise jaw profile and controlled travel needed for a proper crimp.

How To Use The Clamp Pliers For Installation

1. Pick a clamp size that matches the hose and fully spans the barb length.

Step 2: Place the oetiker clamp over the hose before attaching it to the fitting. Ensure the clamp is positioned so the ear is accessible.

3. Line up the pliers for oetiker clamps, making sure the jaws sit evenly over the ear profile.

4. Use steady pressure with the oetiker clamp installation tool until the ear is completely compressed. Avoid partial compressions that can leave sealing gaps.

Step 5: Check the crimp for even deformation and full engagement. If the crimp is incomplete, replace the clamp—these clamps form a permanent seal.

Safety And Best-Practice Tips When Compressing The Ear

Wear safety glasses to protect against small metal shards when cutting or reworking clamps. Use the correct oetiker clamp tool profile to prevent slipping and reduce hand strain. Confirm clamp sizing with a chart before starting; an undersized clamp can damage the hose, while an oversized clamp will not seal. For beverage and plumbing work, choose stainless steel clamps and clean the hose and barb surfaces for a sanitary connection.

Selecting The Right Oetiker Tool And Clamp Size

Choosing the right clamp and tool begins with accurate hose measurement and understanding the job environment. Measure the hose’s outer diameter (OD) once it’s fully seated on the barb. Use sizing charts from suppliers like KegOutlet and Installation Parts Supply to find the right clamp size for your OD. Ensure the clamp’s post-crimp range includes your measured OD for a reliable seal.

The width of the clamp is just as important as its diameter. Narrower clamps fit tight spaces and low-profile assemblies. Wider clamps provide higher sealing force for pressurized lines. Confirm the clamp’s length and ear profile match the hose and fitting before purchase.

How to measure hose diameter and choose the correct clamp size

  • Push the hose fully onto the barb before measuring the outer diameter (OD).
  • Check the manufacturer sizing chart and choose a clamp whose post-crimp range includes your OD.
  • Choose clamp width based on the application: narrow for limited space, wider for greater sealing force.

Tool types: single-purpose, adjustable, and heavy-duty models

Single-purpose clamp pliers are a budget-friendly option for standard ear profiles and occasional jobs. Adjustable oetiker tools with interchangeable jaws are versatile for shops needing to handle different ear shapes and widths. Heavy-duty models are for trade professionals needing consistent crimps across many cycles.

Ergonomics, jaw compatibility, and tool weight should all be considered when making a choice. A compact, lightweight oetiker clamp tool is ideal for occasional work. A professional-grade oetiker clamp installation tool with high leverage reduces hand fatigue during repetitive installs.

Choosing stainless steel clamps and tools for corrosion resistance

For wet plumbing and beverage draft systems, stainless steel clamps are the standard choice. They resist corrosion and maintain sanitary conditions in draft beer lines and moist environments. Match tool finishes to the environment; rust-resistant or stainless components extend tool life.

In field service and brewery work, use a dedicated oetiker hose clamp pliers that fits stainless ear clamps without distorting the profile. Stocking an oetiker clamp pliers tool and a compatible oetiker tool ensures you can complete installs with the correct hardware and minimal rework.

Job Type Clamp Recommendation Recommended Tool Key Notes
Home plumbing repairs Standard narrow stainless ear clamp Single-purpose oetiker pliers Cost-effective and easy to use for occasional repairs
Beverage draft lines Stainless steel clamp with a wider sealing profile Oetiker hose clamp pliers with corrosion-resistant finish Sanitary grade and long-term corrosion resistance required
Trade service and production Range of stainless clamps sized by chart Heavy-duty oetiker clamp installation tool, adjustable jaws Durable, high-leverage tool reduces fatigue and improves consistency

Oetiker Tool Comparison: Quality, Brands, And Buying Options

Choosing the right oetiker tool involves examining real examples and build quality. The Beta 014730010 (1473A) stands out as a professional-grade option, weighing about 393 g. It is known for its reliable jaw profile precision. Various manufacturers offer pliers for oetiker clamps, differing in materials, finish, and warranty terms.

Weight and ergonomics should be considered when comparing tools. Tools weighing 300–400 g reduce fatigue while providing enough leverage. Features like cushioned grips and well-shaped handles are essential for repetitive tasks. The best oetiker pliers offer a balance between leverage and user comfort, ensuring consistent crimps.

The correct jaw profile compatibility is critical. Mismatched jaws can lead to poor crimps and clamp failure. Always check the jaw shape against the ear profile of your clamps before buying. A tool with interchangeable jaws can save time when working with multiple clamp sizes.

Below is a concise comparison to help guide your selection.

Model And Type Approx. Weight (g) Strengths Ideal Use
Beta 014730010 (1473A) 393 Precise jaw profile, trade warranty, durable finish Professional plumbing and beverage systems
Interchangeable-jaw specialty pliers 320–420 Versatile for multiple ear profiles, good ergonomics Workshops with varied clamp types
Heavy-duty ear clamp pliers 420–550 Robust frame and added leverage for thicker stainless clamps Industrial hose work
Starter kits (tool + clamps) Tool about 350 Useful for new setups with matched clamp sizes Small service shops and draft system setups

When purchasing Beta clamp pliers or similar brands, stick with authorized dealers. This ensures warranty support and genuine products. KegOutlet and similar suppliers offer Oetiker clamp kits and tools for draft systems. Installation Parts Supply is a recommended distributor for trade pricing, bulk orders, and professional-grade stainless Oetiker clamps.

Look for vendors with clear return policies and parts service. A verified supplier can replace jaws, honor warranties, and provide spare clamps. For dedicated users, investing in a high-quality oetiker clamp pliers tool pays off in fewer reworks and more consistent crimps.

Maintenance, Common Problems, And Alternatives

It is important to keep tools in excellent condition. Regular cleaning, light lubrication, and dry storage prevent rust and wear. Inspect jaws for deformation and replace tools that no longer shape the ear correctly to avoid wasted clamps and failed seals.

Maintaining pliers and prolonging tool life

After each use, clean the oetiker clamp pliers tool of fluids and debris. Apply light machine oil to pivot points and rust-inhibiting spray for wet environments. Store the tool in a dry place and inspect teeth and jaw profiles for chips or bending.

Common installation problems and how to fix them

An undersized clamp can damage the hose or fail when pressure increases. Use a sizing chart to match hose diameter to clamp size. Choose pliers for oetiker clamps that match the clamp profile. Uneven crimps often result from misalignment. Ensure the oetiker ear clamp tool seats fully over the ear and the jaws align before compressing.

When the crimp is poor, cut off the damaged ear clamp and replace it with a new one. Use a clamp cutter or tin snips with care to avoid nicking the hose or fitting. For applications needing frequent rework, consider adjustable clamp systems that allow removal and reuse, while noting trade-offs in profile and permanence.

Alternatives and when they should be used

For serviceable connections and future disassembly, worm-drive clamps are a suitable option. They are adjustable and reusable but bulkier than ear clamps. Crimp-style swaged or ferrule clamps create permanent mechanical bonds with a swaging tool. They serve fuel lines and hydraulic fittings where specs require them.

Choose an oetiker clamp installation tool or an alternative based on serviceability, space limits, pressure needs, and corrosion environment. Selecting the right approach reduces failures and saves time during repairs.

Final Thoughts

Proper Oetiker Clamp Pliers Tool selection and correct use are crucial for achieving a durable, leak-free connection. The tool is designed to provide consistent crimps on ear-style clamps. Matching clamp size and material is essential, whether the job involves plumbing or beverage systems. Always measure hose OD accurately and refer to sizing charts to prevent undersized or loose fittings.

Choose professional-grade equipment when reliability matters most. The best oetiker pliers and a dedicated tool minimize rework and ensure even crimps. Brands like Beta offer clamp pliers that complement quality clamps. Specialist suppliers provide charts and replacement parts, supporting trade use. A proper installation tool ensures secure seals with a low profile that hold up against vibration and corrosion.

For sourcing, buy clamps and tools from reputable plumbing wholesalers and distributors, such as Installation Parts Supply. They offer stainless Oetiker clamps, spare parts, and professional-grade pliers. When the right clamp size is paired with the correct Oetiker Clamp Pliers Tool and proper best practices are followed, the result is a neat, permanent hose connection. These are ideal for both commercial and residential applications.

Why a Beer Drip Tray With Drain Prevents Sticky Floors

Improve your bar’s efficiency with a top-tier beer drip tray featuring a drain. This smart addition captures drips from taps, safeguarding countertops and kegerator surfaces from spills. It streamlines daily cleaning for busy establishments across the United States.

Website about Stainless Steel Drip Tray With Drain
The selection includes countertop, surface-mount, wall-mount, flush-mount, and wrap-around trays for multi-tap towers. Select stainless steel for durability and resistance to corrosion, or pick cost-effective alternatives when necessary.

These trays are designed to work seamlessly with glass rinsers and feature reliable drain components. You’ll get chilled, beer-clean glassware and dependable drainage. Easy-to-clean features like removable grates and welded corners ensure maintenance is a breeze. This is ideal for brewpubs and serious home kegerators.

Why Bars Need A Beer Drip Tray With Drain

Busy bars and taprooms depend on small details for smooth operations. A quality drip tray for beer keeps counters dry, reduces sticky buildup, and shortens sanitation time. The right bar drip tray with drain transforms a messy spill into a controlled waste flow. This allows staff to focus more on serving and less on cleaning.

Maintain Cleanliness And Lower Slip Hazards

Drip trays catch overflow and stray drips, preventing them from pooling on surfaces and floors. By draining liquids away from walkways, cleanup becomes quicker and slip risks decrease during busy times. Easy-to-clean designs and removable grates make sanitation faster, allowing teams to adhere to health codes without disrupting service.

Countertop Drip Tray With Drain

Protect Counters And Kegerator Equipment Against Spills And Corrosion

Moisture can stain or corrode countertops and kegerator casings. A kegerator drip tray with a reliable drain directs beer and rinse water away from sensitive components. This protection extends the life of stainless steel towers, wooden bars, and keg collars, saving on repair costs.

Improve Guest Experience With Cleaner Pour Areas And Glass Rinsers

Customers appreciate a clean pour station. A well-placed beer tap drip tray creates a neat presentation and pairs well with integrated glass rinsers for chilled, clean glassware. Bars using wrap-around or tower drip trays maintain consistent pours and fewer off-flavor complaints, boosting reviews and repeat visits.

Smaller venues and home bar setups benefit too. Compact countertop drip tray solutions fit under single taps on kegerators, while wrap-around options suit commercial tap walls. Matching the tray type to traffic levels keeps operations efficient and guest impressions positive.

Beer Drip Tray Types: Countertop, Surface Mount, Wall Mount, And Flush-Mount

Choosing the right drip tray can significantly reduce cleanup time and protect your bar from spills. There are various options available, each catering to different needs and budgets. Whether you’re setting up a home kegerator or managing a busy commercial tap wall, there’s a style that fits your requirements.

Countertop Drip Tray With Drain Options For Busy Bars And Home Kegerators

Countertop trays come in sizes ranging from small pads for a single tap to large pans for multi-tap towers. They often feature removable grates and brass drains for efficient drainage and easy cleaning. These trays are perfect for those who prefer minimal installation and flexible placement, whether at home or in a small bar.

Surface Mount Drip Tray With Drain For Easy Retrofits And Minimal Counter Modification

Surface mount models secure to countertops without needing drilled openings. They’re ideal for those who want to avoid structural changes during remodels. You can opt for stainless steel or durable plastic, depending on your needs and budget. These trays offer a quick solution for retrofits while keeping plumbing options open.

Wall Mount Drip Tray Advantages For Space-Saving Behind Bars

Wall-mount trays preserve valuable counter space and pair nicely with tap walls. These trays commonly connect to drip lines or hoses that run to floor drains or collection tanks. That setup helps staff free up bar-top workspace for service and cuts clutter in busy tap areas.

Flush-Mount And Integrated Drip Tray Solutions For Custom Bars

Flush-mount trays integrate smoothly into the countertop for an upscale appearance. They’re favored in boutique craft bars and custom home bars. Wrap-around designs protect the area around towers and provide continuous guard rails for spills. These solutions require planning but offer a polished finish that suits custom layouts.

Many suppliers keep surface mount, wall mount, and flush-mount drip trays in stock. Demand for specific sizes and finishes can fluctuate, so it’s wise to confirm availability before finalizing a build or retrofit.

Material Comparison: Stainless Steel Vs Plastic Drip Trays

The material you choose influences performance, hygiene, and overall bar aesthetics. This guide helps operators decide between durable metal and cost-effective plastic for a reliable drip tray with drain.

Benefits Of Stainless Steel Beer Drip Trays: Durability, Corrosion Resistance, And Appearance

For high-traffic bars, stainless steel stands out because of its strength. It withstands acidic beer spills and cleaning chemicals, maintaining its appearance and function over time.

Welded corners and brass drains on stainless steel trays help reduce leaks and improve durability. The metal finish complements commercial beer tap hardware and kegerator designs, ensuring a professional look.

When A Plastic Drip Tray With Drain Is The Right Budget-Friendly Choice

Plastic trays are more affordable and lighter, making them perfect for temporary events or secondary stations. High-quality polymers resist staining and are easy to replace if damaged.

In home kegerators or low-traffic stations, plastic trays provide protection without the premium cost of stainless steel.

Cleaning, Hygiene, And Longevity Considerations For Each Material

Stainless steel offers a non-porous surface that is simple to sanitize. Its smooth interior and removable grates streamline cleaning, reducing bacterial risk. This makes stainless steel trays a wise choice for frequent washing.

Plastic trays may develop scratches and trap residue, often resulting in more frequent replacement. In budget-conscious settings, anticipate regular swaps to maintain hygiene standards.

Feature Stainless Steel Plastic
Overall durability High; resists dents and wear under heavy use Moderate; may crack or warp under pressure
Resistance to corrosion Excellent resistance to beer acids and cleaning products Good; may stain over time
Hygiene Non-porous and easy to sanitize; low bacteria retention Can retain debris in scratches and may require more frequent replacement
Weight Heavier; stable installation
Initial cost Higher upfront cost More affordable upfront
Typical use case Busy bars, commercial installs, long-term value Home kegerators, temporary setups, tight budgets
Drain fittings Often fitted with brass drains and bottle traps Basic drains are available; fittings are less durable

Material selection should be based on traffic, sanitation needs, and design preferences. A drip tray with drain should protect surfaces and maintain tidiness while aligning with the bar’s budget and style.

Key Features To Look For In A Drip Tray For Beer

Choosing the right drip tray is essential for protecting your bar, streamlining cleaning, and maintaining pour quality. It’s important to consider features that align with your service style. Whether you manage a bustling draft tower or a compact station, the right drip tray is key.

Effective drainage systems are a must. Opt for a drip tray with a removable bottle trap to catch solids and glass fragments. Brass drains are durable and ensure a secure connection to floor drains or waste lines, provided by suppliers like Installation Parts Supply.

Look for a drip tray with a removable grate for quick cleaning. This feature allows staff to clear debris and rinse the trough efficiently. The tray’s interior should have smooth profiles and welded corners to prevent buildup and leaks.

Wrap-around beer drip trays offer strong protection around multi-tap towers. Ensure the tray’s size matches your tower’s footprint to avoid spills. For single taps or tight spaces, a compact countertop tray offers protection without taking up valuable bar space.

Mounting style is critical if you want a proper fit and a clean finish. Verify the tray’s mounting type, whether it’s surface, wall, or flush-mount. Also, check its alignment with your tower, tap, or kegerator. Confirm the drain outlet size and compatibility with common waste hoses before making a purchase.

Serviceable parts and durable hardware are essential. Look for trays with removable traps, replaceable grates, and standard hose fittings. This ensures easy repairs and minimizes downtime. A well-chosen drip tray with a drainage system enhances daily operations and maintains a professional bar appearance.

Installing And Maintaining Your Bar Drip Tray With Drain

The first step is to plan the layout around your taps and counter edges. Measure spots for the tray and any nearby kegerator to ensure a good fit. Choose surface mount if you want minimal cutting, or select a flush option when a seamless look is needed.

Basic installation process

1. Mark where the tray will sit and make sure the grate and tap handles have enough clearance.

2. Secure the tray per the manufacturer’s instructions, using stainless fasteners for wet environments.

3. When installing a countertop drip tray with drain, fit the drain and test flow before sealing.

Drainage and plumbing tips

Use a removable bottle trap to catch solids and speed up cleaning. When routing hoses, keep a steady slope to the waste point to avoid standing liquid. Match brass drain threads to compatible adapters for durable connections.

Clog prevention

Use inline strainers in high-pour areas to reduce debris. Schedule daily checks and empty the bottle trap as part of bar opening or closing duties. Flush the drain with hot water and a mild cleaner to prevent sticky buildup.

Cleaning, Sanitizing, and Winterizing

Remove the grates and scrub stainless surfaces with a food-safe cleaner, then sanitize according to health code. For kegerator drip tray maintenance during high season, perform a weekly deep clean and replace worn grates. Seasonal businesses should drain hoses and remove traps before freezing weather to prevent damage.

Spare Parts And Accessories

Have spare grates, bottle traps, and drain fittings ready for quick swaps. Purchase replacement parts from trusted plumbing wholesale distributors like Installation Parts Supply for reliable compatibility and industry-standard materials.

Task Frequency Best Practice
Drain visual check Daily Inspect for standing liquid and clear visible debris
Empty bottle trap Daily to weekly (depending on use) Remove it, wash it, and inspect for trapped solids
Full tray and grate cleaning Weekly basis Scrub with food-safe cleaner and sanitize
Inspect hoses and fittings Monthly Verify clamps, hose pitch, and brass threads for leak signs
Winterize (if seasonal) Ahead of freeze season Empty hoses, remove traps, and store small parts inside

Choosing The Right Beer Tap Drip Tray For Your Bar Setup

When choosing a bar drip tray, begin by evaluating your bar’s layout and service style. Consider the tap tower’s location, the number of taps, and the counter’s depth. Also, think about how staff move behind the bar. This information helps determine whether you need a compact countertop tray or a larger wrap-around model for tower installations.

Reviewing Layout And Tap Configuration

Measure the area around every tap tower and count the active pouring stations. Multi-tap towers often require a wrap-around beer drip tray to catch overflow from multiple faucets.

For portable setups or single-tap stations, a compact drip tray is usually ideal. It fits on narrow counters, allowing for quick glass rinsing and cleaning.

Matching Finishes And Materials

When choosing a drip tray, consider aesthetics versus durability. A stainless steel drip tray with a drain is a good choice for commercial settings. It resists corrosion and is easy to clean.

Choose a plastic drip tray with a drain for pop-up events or seasonal patio use. It’s a cost-effective option for lower-traffic areas where durability is less of a concern.

Traffic, Features, And Drivetrain Choices

High-traffic venues benefit from welded stainless trays with robust brass drains and removable bottle traps. These features prevent clogs and streamline maintenance. Look for trays with removable grates for easy sanitizing.

Smaller bars may prefer a basic plastic drip tray with a drain. It’s lightweight, inexpensive, and suitable for areas with lower volumes.

Budgeting And Lifecycle Cost

Compare the initial cost of a drip tray to its expected lifespan. Stainless steel trays are more expensive upfront but require fewer replacements over time. Plastic trays are cheaper initially but may need to be replaced more frequently.

Remember to include the cost of plumbing fittings, grates, glass rinsers, and possible installation by a licensed plumber in your budget. A wise choice balances the quality of the drip tray with your bar’s specific needs and service patterns.

Where To Buy And Trusted Suppliers — Including Installation Parts Supply

The right source for a bar drip tray with drain can save time and reduce installation issues. Whether you need one item or a complete bar setup, compare suppliers. Look for those who offer in-stock drip trays and clear lead times to plan deliveries around busy periods.

For big orders, a wholesale drip tray supplier provides bulk pricing and consistent stock. Commercial kitchen dealers like WebstaurantStore and restaurant supply houses have a wide range. They offer stainless and plastic models, wrap-around trays, and replacement grates for high-volume bars.

Why Pick A Plumbing Wholesale Distributor Like Installation Parts Supply For Drains And Fittings

Installation Parts Supply is a trusted source for plumbing supplies. They offer brass drains, removable bottle traps, and hose adapters that fit bar drip tray systems. Using a plumbing distributor ensures compatibility between tray outlet sizes and drain hardware. Always confirm the drain outlet diameter and order compatible fittings to avoid on-site modifications.

In-Stock Availability, Lead Times, And Matching Accessories

Check product listings for in-stock drip trays and note available quantities. Many suppliers display stock counts for immediate shipment of surface mount and wall mount trays. Request product specs for glass rinsers, replacement grates, and welded stainless options to ensure the supplier can supply both tray units and plumbing components.

Before submitting large orders, commercial buyers should confirm bulk discounts, shipping lead times, and return policies. Request drain outlet sizes, material finish options, and warranty terms to streamline installation and reduce downtime during build-outs.

Final Thoughts

Choosing to invest in a beer drip tray with drain is a practical step for better cleanliness, safety, and efficiency. Whether opting for a countertop or wall-mount model, choose based on your space and flow. This protects your counters and kegerator from spills.

Focus on features such as removable grates, brass drains, and bottle traps for easier cleaning and reduced clogging. Compatibility with glass rinsers and standard plumbing enhances functionality and hygiene, vital during peak hours.

Your material choice affects both cost and lifespan. Stainless steel is ideal for commercial bars due to its durability and resistance to corrosion. For low-traffic or temporary needs, plastic trays might suffice, balancing cost with functionality.

Ensure parts come from trusted suppliers like Installation Parts Supply for quality drains and fittings. A well-planned installation and regular maintenance routine will prevent clogs and prolong your drip tray’s life.

Why a 1 2 T Fitting is a Staple in Every Plumber’s Kit

More than seventy percent of service teams prefer forged brass fittings for repeat repairs. They typically outlast cheaper alternatives when leak resistance matters. Brass Forged Compression Tee’s are widely used by plumbers, MRO technicians, and engineers. They often require trustworthy pipe fittings and durable brass hardware. They unite brass corrosion resistance with forged-body strength. They work well in plumbing, hydraulic, pneumatic, and instrumentation systems.

Read more about 1/4 Compression T Fitting
Supplier catalogs typically present pricing in a clear format. As an example, SKU FIT-271 is a 5/16″ Brass Compression Tee. It costs around $17.69 for a single unit and $8.84 at three units. This pricing pattern shows how brass hardware and fittings are marketed through wholesale distributors like Installation Parts Supply.

Engineers and purchasing teams benefit from forged construction when selecting components for leak-free assemblies. This guide helps confirm compatibility with copper, aluminum, or thermoplastic tubing. It further helps identify when forged brass tee fittings make the most sense for a given system.

Important Takeaways

  • Forged brass compression tees deliver strong long-term durability in plumbing and industrial settings.
  • They are available through wholesale channels with transparent retail and bulk pricing.
  • Common SKUs like FIT-271 illustrate typical market pricing and SKU formats.
  • These brass fittings can be used with several tubing materials when installed correctly.
  • Installation Parts Supply and similar distributors offer stock availability and technical support for buyers.

Why Select Forged Brass Tee Fittings For Plumbing And Industrial Use

Forged brass tees strike a perfect balance between strength and longevity in plumbing and industrial settings. The forging process improves the grain structure of the metal, lowering the chance of internal defects and increasing fatigue resistance. This makes them a top choice for applications where reliable connections are essential.

Compression fittings made from forged brass exhibit superior corrosion resistance compared to some alloys and plated materials. Their capacity to handle water, many hydraulic fluids, and typical industrial conditions without rapid degradation is notable. That reliability reduces maintenance demands and supports long-term installations.

In terms of strength, forged parts usually perform better than cast or machined alternatives. They can handle higher mechanical stress and resist cracking better, even under conditions of vibration or handling. This translates to fewer failures and less downtime for installers and maintenance teams when using forged brass tees over weaker cast fittings.

These fittings are built to handle a useful range of temperatures and pressures suitable for plumbing and low- to medium-pressure hydraulic use. Suppliers such as Parker and Eaton list straight compression fittings rated to roughly 500 PSI with service temperatures from -65°F to +250°F. However, some designs are not recommended for gaseous media or high-vibration steel tubing runs, so proper product selection remains essential.

In the realm of plumbing fittings and compressed-fluid systems, forged brass tees stand out due to their durability and corrosion resistance. Plumbers, HVAC technicians, and industrial buyers often favor them. Where dependable sealing and sound mechanical performance are needed, forged brass tees and compatible compression fittings remain a practical, well-established choice.

1/2 Inch Compression Fitting

Brass Forged Compression Tee’s Explained

Forged compression tees are compact, dependable components for splitting or combining flow in fluid systems. These brass fittings are produced to tight tolerances, helping ensure an accurate fit with tubing and threaded ports. Catalogs list various types, including branch, run, and union-style tees, alongside elbows and straight fittings for seamless system planning.

Available product configurations

Branch tees form a perpendicular outlet from a main run. Run tees keep three pathways aligned to support balanced flow. Union-style tees include a removable section for easier disassembly during maintenance. These styles are offered in both SAE and NPTF-threaded versions, helping them match a wide range of valves and components.

Compatible tubing materials

Compression tee fittings are compatible with copper and aluminum tubing without inserts. For thermoplastic tubing, a support insert is necessary to prevent collapse and ensure a tight seal. In certain product lines, manufacturers advise against using these fittings with steel tubing to avoid premature wear in mixed-metal systems.

Where they excel

Because they resist corrosion and are easy to install, Brass forged compression tee’s are highly suitable for plumbing work. They are also used in hydraulic and pneumatic systems, including control manifolds and fluid power lines. Instrumentation and HVAC systems benefit from their compact design for retrofit work.

OEMs, integrators, and MRO teams prefer Brass tee fittings and Compression tee fittings for their predictable performance and cross-compatibility. Their availability in full-pattern and light-pattern versions helps address different thread engagement and clearance requirements without changing part families.

Certain catalog entries provide lead-content notes for local plumbing code compliance. Specification sheets may note whether a part is Not lead free and whether the part number identifies a Light Pattern variation. This information helps buyers and technicians select the right item for safety, code compliance, and long-term reliability.

Compression Fitting Features And Operation

Compression fittings offer a reliable, solder-free connection through a simple mechanical process. The nut, sleeve (ferrule), and body work together as a system. The ferrule is compressed around the tube when the nut is tightened. That compression produces a tight metal-to-metal seal that can handle typical plumbing and hydraulic pressures without requiring adhesives.

Nut, sleeve, and body action

The nut draws the ferrule into the fitting body. As the ferrule engages the tube, it creates both radial sealing and axial holding force. This design is ideal for applications where a consistent, leak-resistant joint is essential. Manufacturers like Parker and Eaton test these components to verify that they are compatible with standard Brass fittings and associated Brass hardware.

Tool-free, hand-tight, and grab-ring designs

Some fittings include grab rings for fast, hand-tight assembly. These designs save time for maintenance and field installation teams. Standard compression tee fittings, on the other hand, require a torque wrench for full compression and optimal performance. Hand-tight designs are appropriate when they have been validated for the intended application.

Reuse and maintenance

Brass compression fittings can often be reused when disassembled properly, although ferrules may deform. Replacing the ferrule and inspecting the nut before reassembly helps maintain a leak-free connection in critical systems. Suppliers recommend following manufacturer reuse guidelines to protect the long-term reliability of Brass hardware and Compression tee fittings.

Performance and compatibility across brands

Manufacturers subject these components to rigorous pressure and temperature testing. This helps installers select compatible parts with greater confidence. Compression fittings generally interchange among SAE-standard brands when size and standard match. That flexibility makes it easier to use parts from trusted pipe fitting brands without sacrificing performance.

Sizing, Selection Criteria, And Common Part Types

Accurate sizing is key when selecting fittings. Ensure the Tube O.D. matches each compression port. For threaded ports, align the NPTF threads size with the required male or female thread. Even small mismatches can cause leaks or require rework.

How to choose the right connection type and size

Measure the Tube O.D. with calipers and select the matching ferrule and nut for the compression connection. For threaded ports, determine the NPTF thread specification and nominal size, such as 1/8″ or 1/4″ Male NPTF. Catalogs often list both dimensions, like 1/4″ Tube O.D. x 1/8″ Male NPTF or 5/16″ Tube O.D. x 1/8″ Male NPTF.

Understanding part variations

In many systems, male branch tees are widely used and are commonly built in a compression x compression x male NPTF configuration. These fittings allow a tubing run to include a threaded branch connection. Manufacturers often encode size and pattern information in the part number. A “L” suffix indicates a light pattern fitting, which has a shorter thread length but is often interchangeable with full pattern parts.

Example Part Configuration Typical Catalog Size Notes
BF18291 Compression x Compression x Male NPTF 1/4″ Tube O.D. x 1/8″ Male NPTF Typical cataloged configuration
BF18292 Compression x Compression x Male NPTF 1/4″ Tube O.D. x 1/4″ Male NPTF Common 1/4″ NPTF branch option
BF18293 Compression x Compression x Male NPTF 5/16″ Tube O.D. x 1/8″ Male NPTF Suitable for larger tube O.D. with 1/8″ branch

Pressure class and application suitability

Most brass tee fittings are suitable for low- to medium-pressure lines. Certain straight compression parts are rated for as much as 500 PSI and for operation between -65°F and +250°F. Always check product sheets for the exact pressure class before using in hydraulic or instrumentation systems.

Some compression designs are often not recommended by manufacturers for gaseous media. Where heavy vibration or tube movement exists, alternative fittings or added support may be necessary to prevent early failure. Always confirm material compatibility because some fittings may not be suitable for copper, aluminum, or thermoplastic tubing. An insert is often necessary for thermoplastic lines.

Sourcing, Pricing, And Wholesale Options From Installation Parts Supply

Installation Parts Supply lists detailed SKU information and quantity pricing breaks that make comparison easier. Their catalog examples include both retail pricing and bulk pricing for common Brass hardware products. That makes it easier for buyers to plan budgets and purchasing schedules.

Typical pricing examples

Pricing for small quantities shows how much single-unit retail differs from discounted wholesale levels. For instance, a 5/16″ compression tee, FIT-271, is priced at $17.69 retail but drops to around $8.84 per unit in bulk. SAE male branch tees such as BF18291, BF18292, and BF18293 are commonly priced between $7.16 and $7.79. This pricing illustrates the potential savings available through bulk orders.

Stocking and ordering for distributors and MROs

Distributors and maintenance teams benefit from online visibility of SKUs and inventory counts. Installation Parts Supply provides a Request a Quote process. This process gathers customer and shipping details so accurate quotes can be prepared. For bulk orders, additional shipping details ensure firm quotes.

In-stock items help enable fast fulfillment for repairs and installations. Buyers can place bulk-order requests or RFQs, include project notes, and request certifications. That process simplifies procurement for OEMs and system integrators.

Why choose Installation Parts Supply as a wholesale distributor

Installation Parts Supply maintains a broad inventory designed to serve MROs, contractors, and integrators. Their product range includes Wholesale brass fittings and Brass Forged Compression Tee’s. Technical support ensures compatibility with various tubing materials and advises on part selection.

The distributor offers guidance on SAE and pressure connections standards. Replacement sleeves and nuts are available, and their team can also assist with selecting the right part. This type of support shortens specification cycles and makes bulk purchasing easier.

Lead times, customer support, and fulfillment

Established distributors combine transparent Compression fittings pricing with lead-time estimates and customer service. Installation Parts Supply handles quote requests, provides certification data, and coordinates freight for larger shipments. Their inventory, responsiveness, and Brass hardware knowledge help ensure dependable procurement for projects of all sizes.

Final Thoughts

Brass Forged Compression Tee’s offer dependable, corrosion-resistant connections for various systems. Their forged construction and ferrule-based sealing help ensure leak-free performance. They can be used with copper, aluminum, and thermoplastic tubing, although inserts are required for thermoplastic lines.

When picking compression fittings, ensure the tube O.D. and thread type match. Pick the correct pattern based on clearance, then confirm both pressure and temperature ratings. Material compatibility is critical; use inserts with thermoplastic lines and confirm that the fittings meet the required pressure class.

When purchasing, distributors like Installation Parts Supply are worth considering. They offer competitive pricing, quantity discounts, and technical support. Request a quote for lead times and volume pricing. Referencing common SKUs can help with comparison, and their support team can assist with secure installation planning.

Related: A Quick Review of Brass vs Stainless Steel 1 2 Male To 3 8 Male Adapter Links

How to Install a Soda Gun System in Your Commercial Kitchen

Ever ponder how a bustling bar can deliver consistent sodas in moments? All while reducing costs and using very little storage space? This concise guide delves into commercial bar soda gun systems found throughout U.S. bars, restaurants, cinemas, and convenience stores. It highlights how a soda gun for bar service can dramatically improve speed, reduce per-serving costs, and optimize storage compared to traditional cans and bottles.

Click here for Soda Gun Nozzle
You’ll learn about system types, including post-mix and pre-mix, and their core components like Bag-in-Box syrups, CO2, chilled water, and carbonators. You’ll also learn about dispensing options ranging from handheld bar soda guns to fountain towers and draft arms. This overview also covers cooling choices—cold plate versus mechanical refrigeration—and the practical steps for reliable installation and maintenance.

Why A Commercial Bar Soda Gun System Is Worth Installing

Installing a commercial bar soda gun system can dramatically improve service, storage, and profitability for your operation. Post-mix setups combine concentrated syrup, CO2, and chilled water to offer drinks at a far lower cost than cans and bottles. This method is ideal for bars, restaurants, cinemas, and convenience stores that require quick, consistent drink pours.

Cost-per-serving and profitability advantages

Post-mix supplies help reduce costs in a major way. A 5-gallon Bag-in-Box of syrup can make about 30 gallons of finished drink at a 5:1 ratio. This reduces the cost per serving to just a few cents for a 32-oz pour, while retail prices often exceed $2.50. With a soda gun bar setup and efficient portion control, operators can achieve margins of 80–90%.

Service speed and operational efficiency

A soda dispenser or handheld bar gun soda can speed up service times. Staff can pour multiple drinks without leaving the line, reducing wait times during busy periods. This efficiency supports combo deals and higher table turns, increasing average checks and throughput in peak hours.

Space-saving benefits compared with cans and bottles

Bag-in-Box containers are compact and shelf-stable, replacing the need for large pallets of cans and refrigerated tanks. This frees up back-of-house space and reduces refrigeration costs. While pre-mix kegs are suitable for low-volume or niche flavors, a bar soft drink dispenser is generally better for high-volume sites with limited space.

Fit for different venue types

Post-mix soda gun systems are well-suited for medium-to-high-volume environments like gastropubs, stadium concessions, quick-service restaurants, and multiplexes. For mobile operations such as catering trucks or pop-ups, pre-mix cans or small pressurized tanks might be simpler, despite higher per-serving costs. Self-serve venues might prefer all-in-one ice and beverage dispensers, while staffed bars benefit most from a soda gun bar or bar gun soda rig.

The choice of a soda gun bar system depends on volume, menu strategy, and available space. When aligned with operational needs, a bar soft drink dispenser offers better margins, faster service, and a smaller footprint than bottled or canned alternatives.

Soda Dispenser For Bar

How Commercial Bar Soda Gun Systems Operate

A commercial bar soda gun system combines pressurized gas, chilled water, and concentrated syrup to create consistent fountain drinks. This section explains the mixing methods, essential components, dispensing options, and cooling choices. It helps operators select the right equipment based on volume and layout.

Pre-mix and post-mix fundamentals

Post-mix systems mix Bag-in-Box syrup with carbonated water at the point of dispense. They use concentrated syrups, offer a low cost per serving, and allow for easy flavor changes. The typical ratio is about five parts water to one part syrup.

Pre-mix systems, on the other hand, ship ready-to-serve drinks in pressurized tanks or 5-gallon Cornelius kegs. These are plug-and-play, reducing setup time. However, they have a higher per-serving cost and require refrigerated storage space.

Core components: Bag-in-Box syrup, CO2, chilled water, and carbonator

Bag-in-Box containers provide concentrated flavors to the dosing valves. One 5-gallon Bag-in-Box can make many gallons of finished beverage when mixed on-site.

CO2 tanks pressurize the system, carbonating water through the carbonator. Regular CO2 checks and leak inspections are essential to avoid service interruptions.

Filtered, chilled water protects valves and preserves taste. The carbonator injects CO2 into this water, making soda water that the post-mix valve blends with syrup.

Dispensing options: handheld guns, towers, and draft arms

Handheld soda guns are ideal for busy bars. Bartenders use a multi-button gun connected by tubing to remote equipment, ensuring fast service.

Fountain towers mount on counters and connect to under-counter equipment. They are perfect for quick-serve stations where staff pour for customers.

Draft arms or tall towers offer multiple taps for high-volume venues. Their bulky components are housed remotely to reduce noise and heat at the point of sale.

Role of the cold plate and mechanical refrigeration options

Cold plate for soda gun setups chill product lines with ice-filled plates. They are less expensive upfront and cool effectively but require daily ice replenishment and labor.

Mechanical refrigeration units provide steady temperatures without ongoing ice work. High-volume bars and venues with limited staff often prefer these for consistent cooling and lower daily labor needs.

Choose cooling based on footprint, labor capacity, and temperature control needs. Smaller operators might consider a soda gun system for home use as a compact alternative. Commercial venues, on the other hand, scale to full refrigeration.

How To Choose The Right Soda Gun For Bar Service

The right equipment is key to improving speed, reducing waste, and boosting staff comfort. It’s essential to align your menu and sales patterns with a system that offers the right balance of channels, ergonomics, and capacity. Small bars might prefer simpler setups, while high-volume venues require robust, multi-channel solutions designed for continuous use.

Flavor variety and number of valves

Start by counting the flavors you sell the most. Most establishments use 2–6 valves for staples like cola, diet cola, and lemon-lime. Save extra channels for seasonal or promotional flavors to increase repeat business. Before adding rare flavors, track sales for three months to avoid unused valves.

Soda gun for bar versus bar soda machine: ergonomics and form factor

Consider the difference between a handheld bar gun and a fixed bar soda machine. Handheld guns are great for busy back bars and crowded events, providing mobility. The weight, grip, and button layout are critical for reducing bartender fatigue during long shifts.

Countertop or tower bar soda machines offer a stable serving point, ideal for server stations or fixed counters where portability is not necessary. They work well when multiple staff members share one dispensing spot.

Key handheld soda dispenser features to evaluate

The placement and feel of buttons can significantly speed up pours. Group core drinks on adjacent buttons for quick access. Opt for a handheld soda dispenser with removable, easy-to-clean nozzles to prevent syrup buildup.

Hose length is also important. Ensure it’s long enough to serve all stations without kinks. Label each line with permanent markers or tags to keep brands and syrup types clear during changeovers.

Matching system capacity to expected volume and service style

Low-volume venues might choose small post-mix systems or pre-mix setups to lower initial costs. Busy bars, on the other hand, should invest in multi-valve systems with mechanical refrigeration, a larger Bag-in-Box inventory, and portion-control valves. This maintains consistency and reduces syrup waste.

Consider a bar gun dispenser or soda gun for bar that supports portion-control or electronic pumps when slow pours impact profit. Align your equipment choice with service speed, staffing levels, and peak-hour demand for optimal results.

Installation And Soda Gun Setup Best Practices

Proper soda gun setup begins with planning plumbing, electrical, and parts sourcing before mounting any equipment. A detailed checklist helps avoid downtime and costly rework. Follow these steps for a smooth soda gun installation, ensuring restaurants and bars can quickly serve consistent drinks.

Waterline and professional plumbing considerations

For hard-plumb post-mix systems, a dedicated cold water line and a shut-off valve near the carbonator are essential. Install a floor drain for condensation or overflow. Use a beverage-grade water filter and replace it every 3–6 months, more frequently in hard water areas, to protect equipment.

Ensure dedicated electrical circuits for mechanical refrigeration and the carbonator. Provide technicians with clear access to valves and service panels for efficient repairs.

Tubing cuts, ear clamps, barb fittings, and line labeling

Measure and cut tubing runs with a clean, square cut. Use ear clamps, barb fittings, and crimp them securely. Test each joint for leaks with a soap solution before completing the installation.

Label each line with permanent markers or adhesive tags, indicating syrup brand and flavor. Labeled lines streamline syrup swaps and troubleshooting, reducing service interruptions.

Mounting the soda gun housing, drip cup connections, and ventilation clearance

Attach the mounting plate and secure the soda gun housing to the bar using suitable fasteners. Connect the hose from the gun to the drip cup for spill and condensate drainage. Empty and clean drip trays daily for hygiene and appearance.

Ensure proper ventilation clearance around refrigeration units and carbonators, adhering to manufacturer specifications. Adequate airflow prevents overheating and facilitates safe access for routine checks.

Working with a distributor and sourcing from Installation Parts Supply

Acquire reliable soda gun parts and supplies from reputable plumbing wholesalers and distributors, such as Installation Parts Supply. Source beverage-grade hoses, ear clamps, barb fittings, nozzles, cold plates, and replacement components that match equipment specifications.

Collaborate with experienced installers or equipment specialists for calibration of Brix ratios, CO2 regulator setup, and leak testing. Maintain a stocked spares list for ear clamps, barb fittings, nozzles, and hoses to minimize downtime of the soda gun dispenser.

Cleaning, Maintenance, And Troubleshooting

Regular care is essential for a commercial soda system’s reliability and taste. Daily tasks, weekly sanitation, and scheduled service prevent downtime. Always use genuine soda gun parts for replacements to maintain performance and flavor.

Daily nozzle and valve cleaning

At the end of the day, remove nozzles and clean valve faces to prevent syrup drying. Soak removable tips in a manufacturer-approved cleaner and rinse with potable water. Clean drip trays and wipe the soda dispenser gun’s external housings to avoid sticky buildup.

Weekly line sanitizing and drip tray care

Sanitize syrup and water lines weekly, following the manufacturer’s instructions. Flush lines with an approved sanitizer, then run potable water until all residue clears. This prevents flavor carryover. Also, disassemble ice chutes and dispensing areas for a deeper clean when present.

Periodic maintenance: CO2 checks, filters, and professional service

Regularly check CO2 tank pressure and test fittings with a soap solution for leaks. Replace water filters every three to six months to protect the carbonator and maintain taste. Schedule seasonal inspections for refrigeration, cold plates, and overall calibration by a certified technician.

Common issues and how to diagnose them

  • Syrup buildup: sticky nozzles or slow pour — inspect nozzles, clean lines, and swap worn gaskets for correct sealing.
  • Flat soda: poor carbonation often signals low CO2 pressure, an empty cylinder, or inadequate cooling — inspect tank levels and temperature.
  • Leaks: trace wet spots to ear clamps, barb fittings, and hose joins — tighten or re-crimp tubing and replace failing soda gun parts.
  • Flavor contamination: off-tastes signal cross-connection or poor sanitizing — flush lines and verify correct labeling and hose routing.

When facing persistent faults, follow the equipment maker’s troubleshooting steps before replacing parts. Keep a basic parts kit with extra nozzles, O-rings, and clamps for quick repairs and uninterrupted service.

Key Components, Parts, And Upgrades For Longevity

Ensuring a commercial soda system’s reliability hinges on the right parts and timely upgrades. Regular maintenance of wear items prevents downtime and safeguards profit margins. Below, we highlight the core components and optional enhancements critical for sustained performance.

Must-have soda gun components

  • Removable soda gun nozzle pieces facilitate daily cleaning, reducing syrup buildup. Replace nozzles at the first sign of wear to maintain flow and flavor.
  • Food-grade hoses, ear clamps, and barb fittings form the fluid path. Keep extra hoses and clamps on hand to fix leaks quickly during peak service.
  • Choose a cold plate for soda gun systems that matches valve count and peak demand. A properly sized cold plate keeps drinks at the right temperature and reduces foaming.
  • CO2 regulators and carbonator components need regular service. Worn diaphragms and seals can hurt carbonation and should be inspected routinely.

Optional upgrades that add control and insight

  • Portion-control valves help deliver consistent pour volumes and limit over-pouring. They are especially useful in high-volume locations.
  • IoT soda gun monitoring sends alerts for low syrup, low CO2, and temperature drift. Remote dashboards aid managers in troubleshooting across multiple locations.
  • Touchscreen interfaces and flavor-infusion modules offer upsell opportunities for self-serve formats. They simplify customization for guests and staff.

Ice integration and choosing the right bin

  • Integrated ice-and-beverage systems speed service by combining drink dispensing with ice handling. Choose bin size according to peak demand, from smaller 100 lb bins to 580+ lb commercial options.
  • Choose the ice type based on the dispense profile. Cubed ice melts more slowly and preserves dilution, while cubelet or nugget ice chills faster but may dilute drinks sooner.

Where to source reliable parts and service

  • Source hoses, clamps, fittings, nozzles, and installation hardware from established plumbing wholesale distributors. Good supplier relationships help reduce lead times.
  • Installation Parts Supply stocks common replacement items and installation hardware used by service technicians. Having a local account expedites emergency parts replacement.
  • Collaborate with certified service technicians for periodic inspections. A standing maintenance agreement reduces surprise failures and extends equipment life.

Cost Factors And Return On Investment

Installing a commercial bar soda gun system involves various costs. These include the initial purchase of a soda gun machine, a cold plate or refrigeration unit, a carbonator, a CO2 tank, water filtration, and professional installation. Skilled technicians ensure proper installation, including tubing, crimps, mounting, and refrigeration hookups. This is essential for warranty protection and long-term performance.

Starting Costs

Basic handheld setups are more affordable than full fountain towers. Investing in a quality bar dispenser gun and a reliable cold plate increases the initial cost. Mechanical refrigeration and a commercial carbonator are additional expenses for higher volume or strict temperature control needs.

Operating Costs

Operating the system involves ongoing expenses. These include BiB syrup, CO2 refills, water, filter cartridges, electricity, and cleaning supplies. Regular service and part replacements are necessary to maintain freshness and consistency. Tracking monthly operating costs helps in budget forecasting.

Estimating ROI

Post-mix serving costs are significantly lower than bottled or canned drinks. Many venues see a return on investment within months, depending on volume. Calculating ROI involves comparing cost-per-serving, increased throughput, and higher check averages against initial and ongoing expenses.

Budgeting For Spares And Replacements

Budgeting for replacement parts and spares is important. This includes nozzles, hoses, clamps, regulators, and periodic cold plate service. Having spare parts readily available, sourced from established distributors like Installation Parts Supply, can minimize downtime. For those considering a soda gun for home, similar spare parts and basic maintenance should be planned for.

Practical Buying Checklist

  • Request several quotes for equipment and installation.
  • Compare long-term operating costs versus cans and bottles.
  • Include labor savings from faster pouring and self-serve options.
  • Set aside funds for a maintenance agreement to protect service quality and uptime.

Closing Summary

Commercial Bar Soda Gun Systems bring significant benefits to establishments that frequently serve fountain drinks. These systems, which include a post-mix soda gun dispenser, Bag-in-Box syrup, CO2, chilled water, and a carbonator, significantly reduce costs and enhance service speed. The right bar soda gun system ensures it meets the venue’s volume and service needs.

Ensuring the soda gun is set up correctly and maintained regularly is essential for consistent quality. This includes proper handling of tubing, ear clamps, barb fittings, and labeling. Daily nozzle cleaning, weekly line sanitizing, CO2 checks, and filter replacement are also critical. These steps keep the machines running smoothly and extend the life of the soda gun parts.

Features such as portion-control valves and IoT monitoring can further limit waste and improve consistency. Obtaining supplies from trusted sources, such as Installation Parts Supply, also helps minimize downtime. When implemented and maintained properly, a soda gun dispenser offers faster service, reduced storage needs, and a strong return on investment for bars, restaurants, and other venues.

Related: Soda Gun For Home Use Review